
Introduction
In today’s digital world, good photography plays a crucial role in selling products. Whether you are running an e-commerce store, a blog, or a website, captivating product photos can make a significant difference in attracting customers and driving sales. The good news is, you don’t need expensive photography gear to create professional-looking product images. In this article, we will explore a range of do-it-yourself (DIY) tricks that can help you elevate your product photography game without breaking the bank.
The Importance of Good Photos in Selling Products
When it comes to online shopping, potential customers heavily rely on product images to make purchasing decisions. High-quality, visually appealing photos not only grab attention but also showcase the features and details of the product, making it more enticing and trustworthy. On the other hand, poorly executed or unappealing images can turn potential customers away, hindering your sales potential.
DIY Tricks for Product Photography
1. Using a White Card for DIY Product Photography: Your Secret Weapon
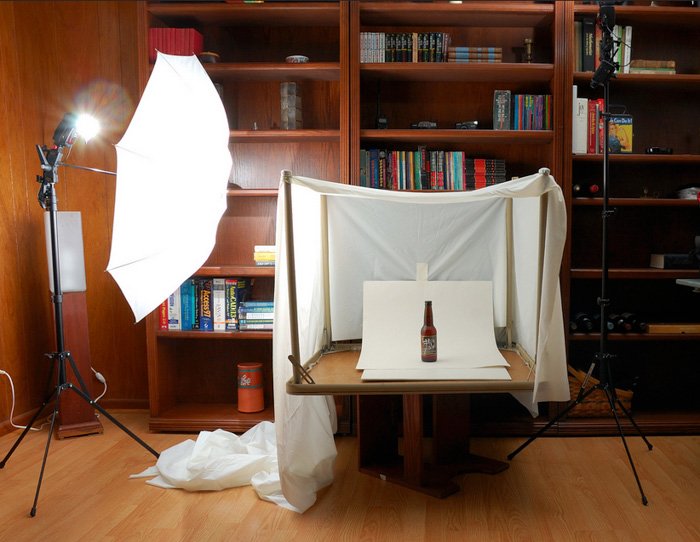
A simple white card can be a game-changer in DIY product photography. It serves multiple purposes, such as providing a clean and professional-looking white background for your product shoots. If the card is large enough, you can even use it to create a DIY infinity curve, which gives the illusion of an endless background. Additionally, the white card can act as a fill light by reflecting light back onto the product, reducing harsh shadows.
Moreover, a sheet of white card can also be used as a DIY bounce card, which helps soften lighting and eliminate unwanted shadows. It proves particularly useful when shooting from a top-down perspective. To ensure optimal results, always keep the white card clean and free from any dirt or smudges.
2. Use Glass for a Cheap Backdrop
If you are looking to add a creative touch to your product backgrounds, consider using glass. This versatile material offers a unique reflective surface that adds depth and detail to your shots. It works well with various types of product photography, as it can reflect the surrounding environment or colored cards.
You may already have sheets of glass at home without realizing their potential for DIY product photography. Picture frames or old mirrors can serve as excellent backdrops for your product images. By experimenting with different glass items and angles, you can achieve creative and visually captivating results, all without spending extra money.
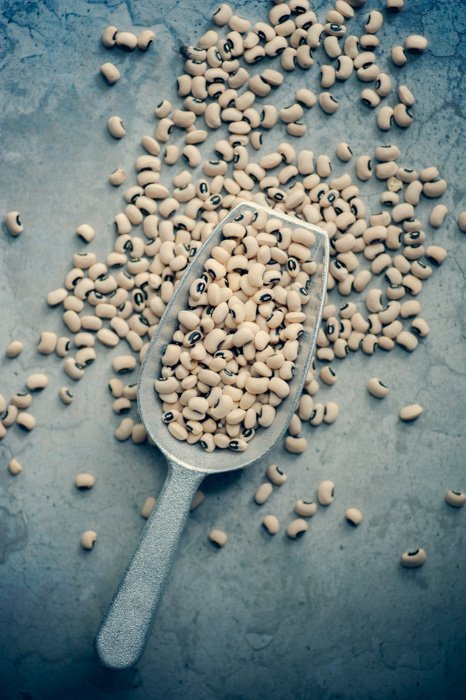
3. Use a Lazy Susan for 360 Product Shots
![]()
360 product images allow viewers to examine a product from every angle, enhancing their understanding and boosting engagement. While commercial turntables for 360 product photography can be quite expensive, you can easily create your own using a simple and affordable tool: the lazy Susan.
A lazy Susan, typically used for distributing food, can be repurposed as a turntable for product photography. Attach a cloth tape measure to the bottom of the lazy Susan and place a white card on its surface. Start with the zero mark facing the camera and take a photograph. Then, spin the lazy Susan by a consistent increment (e.g., 0.5cm) for each subsequent shot, capturing the product from all angles. Once you have a series of images, you can combine them to create an attention-grabbing 360° video or interactive photo experience.
4. Use a Shower Curtain for DIY Lighting
A shower curtain, a low-cost and readily available item, can be utilized in various ways for DIY photography projects, including product photography. When it comes to creating soft, even lighting, especially when using a softbox or daylight balanced light source, a PVC shower curtain can act as a diffuser. By draping the curtain over a medium to small-sized table turned upside down, you can achieve a makeshift lightbox. Additionally, you can use a shower curtain as an infinity curve, providing a seamless and uninterrupted background for your product images.
It’s important to note that patterns or dirt on the shower curtain can affect the quality of light and create unwanted shadows or reflections. Therefore, to produce perfect product images, ensure that the shower curtain you use is white and clean. Consider investing in a high-quality PVC shower curtain liner for optimal results.
5. Use Window Lighting for Different Effects
When it comes to product photography, natural light is abundant, accessible, and offers unmatched versatility. Different times of the day provide distinct lighting effects that can help you convey the desired mood or tone in your product images. For example, shooting towards the evening can result in warm and inviting images, while early morning photography tends to produce cooler tones.
To enhance natural lighting, you can utilize a window with frosted glass. The texture of frosted glass disperses and diffuses incoming light, providing a soft, flattering illumination for your products. If frosted glass is not available, a shower curtain can be used as a makeshift diffuser to achieve a similar effect. To create a clean and professional look, set up your product shoot on a white background sweep, positioned next to a large window. Utilize the natural light entering through the window, and consider using DIY reflectors to bounce light back into the scene, reducing harsh shadows.
6. Go Outside for Natural Shots
Sometimes, a studio setting may not be the best fit for certain types of product photography, particularly those with a lifestyle or nature-inspired aesthetic. Health care products, outdoor items, and food products are just a few examples of products that can greatly benefit from a natural environment.
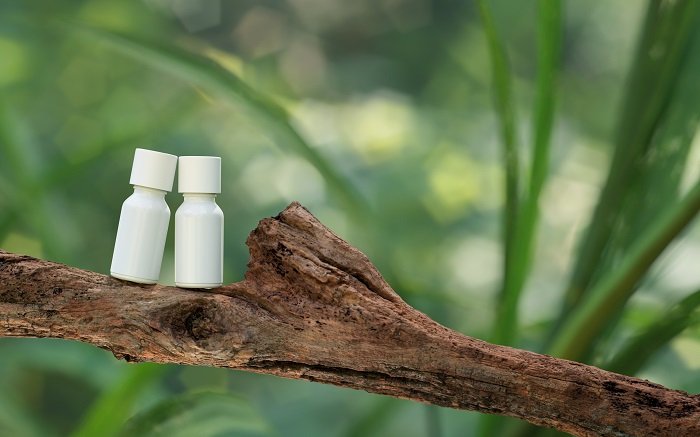
One of the major advantages of photographing products outside is the abundance of free resources. The outside world provides a diverse range of backgrounds, including parks, gardens, urban landscapes, or even your backyard. Natural light, whether it’s the soft glow of morning or the warm hues of sunset, can add a unique and appealing touch to your product images. Remember to take your time to find that perfect location and experiment with different angles and compositions to capture stunning outdoor product shots.
7. Fake a Marble Backdrop for Food Products
When it comes to food product photography, a white background may not always be the best option. Instead, you might want to create a realistic atmosphere that mimics a kitchen countertop or gives a sense of sophistication. One popular option for achieving this is using a faux marble backdrop.
If you are a DIY enthusiast, you can try using old tins or tubes of paint to mix different shades of gray and create a marbled effect on a wooden chopping board. This hands-on approach can produce unique and personalized backdrops for your food products. Alternatively, you can opt for a relatively inexpensive solution by using marble vinyl stickable sheets. These sheets can easily be attached to a surface, instantly transforming it into a stylish and visually appealing backdrop for your culinary creations.
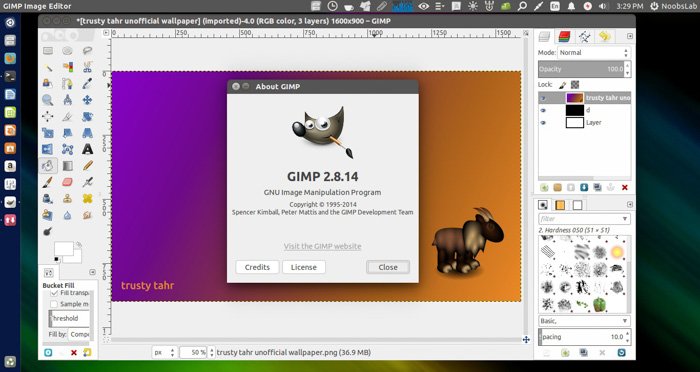
8. Use GIMP for Free Product Photo Editing
GIMP, an acronym for GNU Image Manipulation Program, is a robust and free open-source photo editing software. It offers a wide array of features and tools that can assist aspiring product photographers in enhancing their images.
With GIMP, you can address common image editing tasks such as correcting white balance issues, cleaning up the background, adjusting exposure, and adding text or other elements as needed. Regular updates ensure that you can keep your images of high quality and take advantage of new features as they are released. Furthermore, GIMP’s active user community creates various plugins that extend the software’s capabilities, allowing for a fast and efficient post-processing workflow.
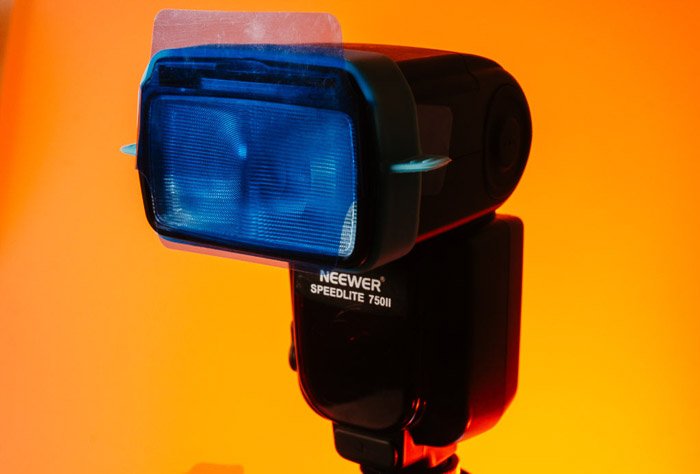
9. Use Gels For Speedlites
For photographers who use Speedlites as their lighting source, gels can be an excellent tool to add creativity and interest to product images. Color gels are transparent sheets that change the color of the light passing through them. By placing colored gels over your Speedlites, you can achieve different lighting effects and create captivating product photos.
Instead of purchasing large sheets of gels and cutting them down to size, consider ordering sample packs that offer a wide range of colors and shades. The Rosco Lux Small Swatchbook, for example, provides nearly 100 different shades for you to experiment with. Adding color to your scenes can be inexpensive yet highly impactful, allowing you to create unique and attention-grabbing product images.
10. Use Fishing Wire to Lift Small Products
Fishing wire, made from transparent materials like nylon or fluorocarbon, is an invaluable tool for product photographers. Its transparency ensures that it won’t ruin your images, and its strength and durability make it ideal for suspending small objects in creative and unique ways.
You can use fishing wire to lift objects from the base of your DIY infinity curve or the plastic container you may be using as a lightbox. By suspending the products from various angles and places, you can achieve dynamic and visually engaging compositions. While there may be slight visibility of the wire in your photos, editing software like GIMP can easily remove it, resulting in clean and seamless product images.
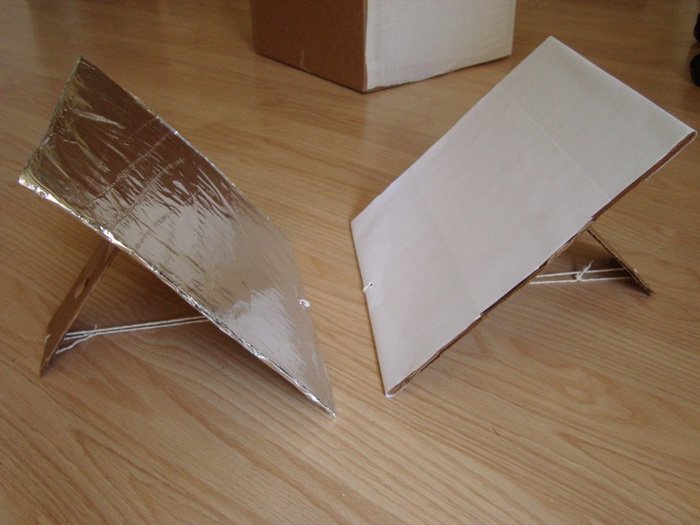
11. Make Reflectors for Perfect Lighting
Reflectors are indispensable tools for manipulating light in product photography. They help bounce light back into the scene, reducing harsh shadows and providing more balanced lighting. Reflectors are particularly useful when working with a single light source, as they help fill in areas that may otherwise be underexposed.
Creating a reflector is a DIY project that can be accomplished using simple materials. A white card or even tin foil can be used to make a reflector. The white card acts as a neutral reflector, while tin foil produces a more specular and focused reflection. When using a reflector, position it strategically to optimize the lighting and enhance the visual appeal of your product images.
12. Use the Camera You Already Own
Many aspiring product photographers believe that they need to invest in expensive professional cameras to achieve high-quality results. However, the truth is, the camera you already own can be more than sufficient to kickstart your product photography journey. In fact, most smartphones today offer impressive camera capabilities that can produce images suitable for social media, blogs, and websites.
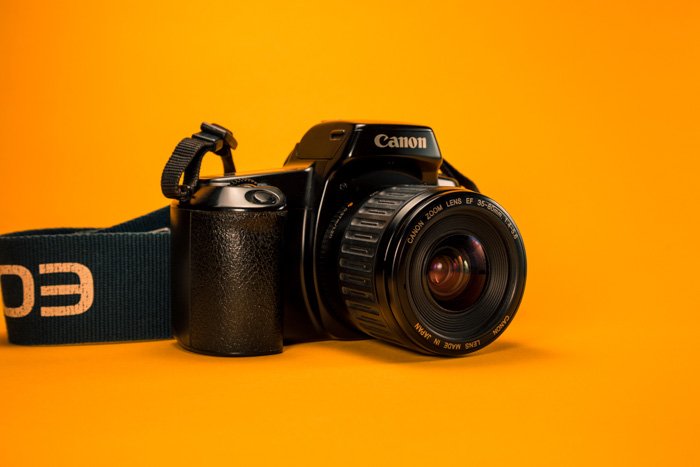
If you do have a dedicated camera, whether it’s a DSLR or a mirrorless camera, leverage its capabilities to shoot in RAW format. RAW files retain more image information and allow for greater flexibility in post-processing. To enhance the professional look of your product images, consider using editing software like GIMP to refine exposure, color balance, and overall image quality.
Conclusion
In conclusion, you don’t need to spend a fortune on expensive photography gear to achieve professional-level product images. These DIY tricks can help you elevate your product photography without breaking the bank. Whether it’s using simple tools like a white card and glass, improvising with household items like shower curtains and lazy Susans, or harnessing the power of natural lighting and editing software like GIMP, there are plenty of cost-effective options available to enhance your product photography skills. So, start implementing these tips and techniques, and watch your product images stand out and sell. Additionally, consider taking an online course like “Products in Focus” to further hone your product photography skills and capture attention-grabbing photos that drive sales.
The article is compiled and compiled by tipcamera.com