
Introduction
Lifestyle product photography is a powerful marketing tool that showcases products in real-life scenarios, making them more relatable and interactive for consumers. Unlike traditional advertising, this approach aims to create convincing imagery by showing products in context rather than against a plain white background. Lifestyle product photography aims to immerse consumers in a vicarious experience, enticing them to make a purchase based on the desire evoked through compelling visuals. In this article, we will explore important tips and techniques to help you master the art of lifestyle product photography and capture perfect shots that resonate with your target audience.
1. Lifestyle Product Photography: Show What the Product Is For
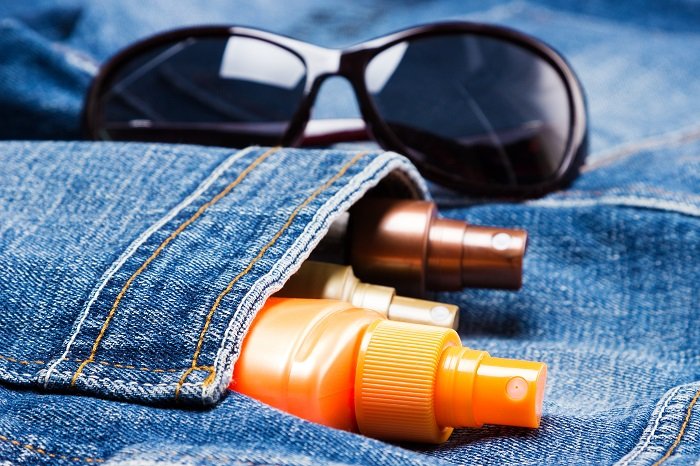
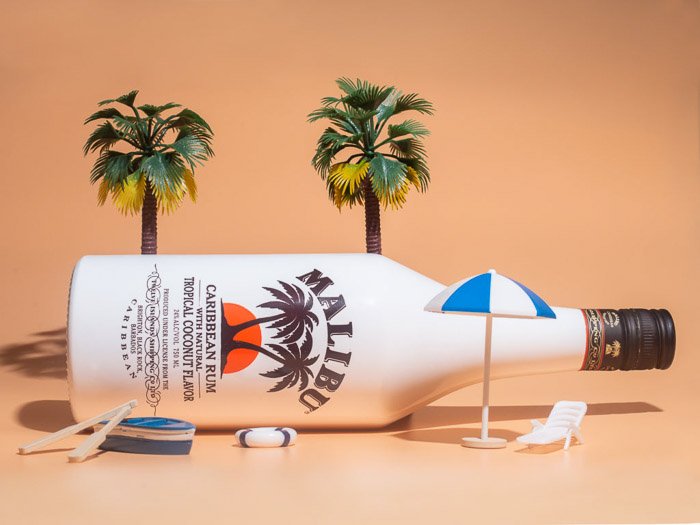
When diving into lifestyle product photography, it’s essential to always start by understanding the product’s purpose and intended audience. By comprehending what the product does and who it caters to, you can determine what elements to include in your images. For example, if you’re photographing a bottle of sunscreen, consider showcasing it beside a pool or at the beach, as those are the most obvious and relatable places where people use such products.
One approach is to capture a model applying the sunscreen while relaxing beside a pool, emphasizing the product’s sun protection benefits. If you seek a more artistic touch, create a still-life composition that resonates with the feeling of being outdoors. Experiment with placing the bottle in sand, on a colorful towel, or protruding from a beach bag. Promote your creativity and seek fresh ideas that haven’t been seen before to captivate your audience.
2. Where to Shoot Your Product
Choosing the right shooting locations is crucial in lifestyle product photography. Whenever possible, opt for authentic settings to avoid the need for expensive background creation. Continuity and believability are key factors when selling the lifestyle associated with a product.
While shooting a sunscreen bottle beside an actual pool or on a beach can be ideal, it’s not always feasible. In such cases, you can simulate the desired scenario indoors. Focus on close-up shots, placing the product beside towels or even a refreshing beverage, like a pina colada, to create the illusion of a poolside setting. By zooming in on the item, viewers are less likely to notice that the photograph was taken indoors.
For added creativity, consider capturing the product conceptually, evoking a desired scenario. For instance, you can use brown paper to simulate sand and create a cardboard poster as the backdrop for a sky effect. While the props may be artificial, they still contribute to a believable scene, even if the photo is taken indoors.
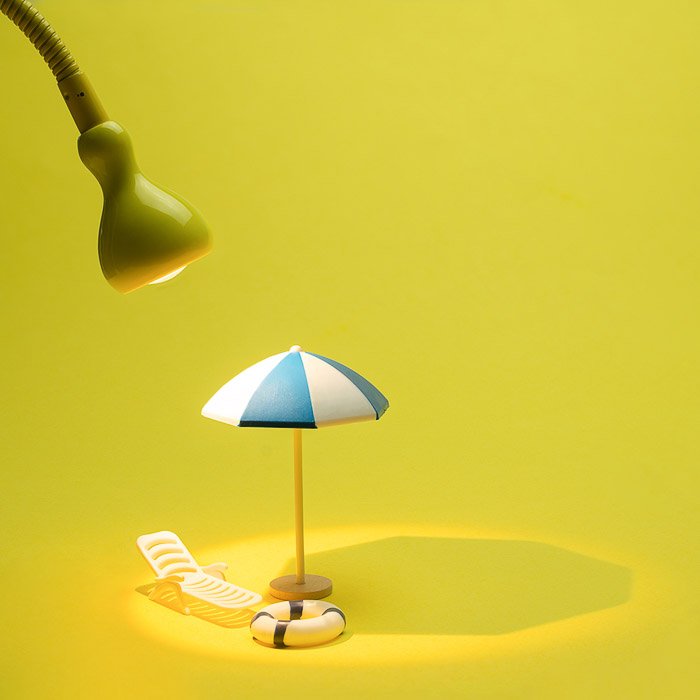
3. What Props to Use
The props you choose play a crucial role in lifestyle product photography, enhancing the sellability of the products by establishing a visual story in the viewers’ minds. When setting up your photography, select props that are directly connected to the product, avoiding random items that may distract or confuse your audience.
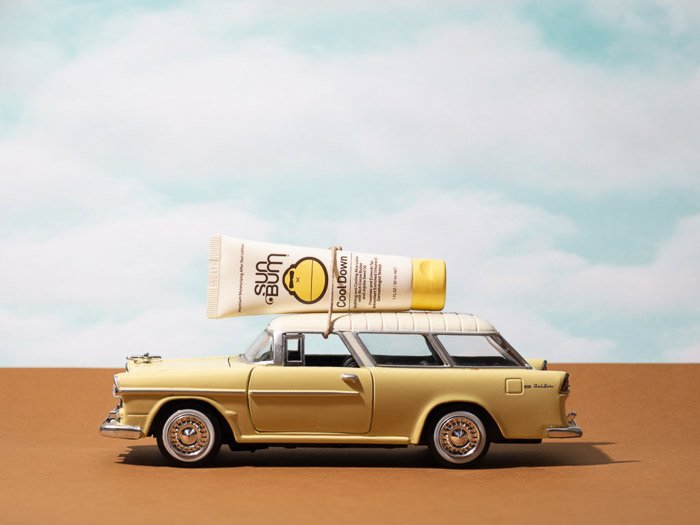
Strike a balance between a well-composed image and avoiding overcrowding. Remember that the product should be the hero of the shot. Limit the number of props to one to three objects. If the scene becomes too cluttered, viewers might overlook the primary subject. Ensure the main product occupies the majority of the frame, as this makes it easier for viewers to locate and appreciate its features.
4. Best Lighting for Lifestyle Product Photography
Lighting plays a critical role in photography, particularly when capturing product images. Each object responds differently to light, necessitating meticulous lighting setups to achieve optimal results.
Generally, it’s advisable to avoid direct light, irrespective of whether it’s natural or artificial, when photographing products. Direct lighting can cause harsh highlights that blow out object details and cast unattractive and distracting shadows. Instead, strive to shoot in shaded areas or diffuse the light sources to create soft, evenly exposed images.
One excellent option is to shoot your products next to a window, as it provides a shield against direct sunlight. To enhance diffusion, you can use a white blanket or a scrim when shooting outdoors in the absence of natural shade. It’s important to carefully observe the lighting setup to avoid distracting specular highlights, such as glimmers on labels or logos, which can divert focus away from the main subject. Adjust your angles until you achieve a glare-free image that highlights the product’s features without sacrificing visual appeal.
Keep in mind that different products may require different lighting setups due to their unique characteristics. For example, amber bottles reflect light differently compared to clear bottles. Experiment and explore various lighting techniques to learn how to illuminate your subjects effectively.
5. Best Angles for Lifestyle Product Photography
As a lifestyle photographer, finding the perfect placement for objects within the frame can be challenging. However, one tried-and-true composition technique that transcends genres is the Rule of Thirds. To apply this rule, activate your camera’s gridlines and position your main subject at the intersections of these lines.
The Rule of Thirds works exceptionally well when dealing with multiple objects in the frame. Once you have mastered composition, it’s time to explore different angles that will best showcase the product. Some common angles used in product photography include eye-level, 45 degrees, and overhead (also known as flat lay).

Eye-level shots involve aligning your camera with the product’s height, providing viewers with a natural and relatable perspective. The 45-degree angle offers a slightly elevated view, showing off the product’s details and features more prominently. Overhead shots, on the other hand, are usually captured from a 90-degree angle, enabling viewers to observe the product from an aerial viewpoint.
Don’t limit yourself to these angles alone; there are numerous other perspectives worth exploring. However, master these three angles initially, as they encompass a wide range of visual possibilities.
6. Use Focus Stacking for Sharper Images
Ensuring your product remains sharp and distinct from the background is paramount in lifestyle product photography. To achieve this, it’s crucial to avoid shooting with wide apertures, such as f/1.8 or f/2, commonly used in portrait photography. Instead, opt for narrower apertures ranging from f/8 to f/22. This choice allows you to capture the product’s intricate details while maintaining overall sharpness.
When dealing with small products, even with smaller apertures, you may still encounter blurry backgrounds due to depth of field limitations. In such cases, focus stacking can be a useful technique to ensure front-to-back sharpness.
Focus stacking involves a two-part process. First, set up your camera securely on a tripod to minimize any movement. Begin by focusing the lens on the front portion of the product, capturing an image. Afterward, adjust the focus to the subsequent sections, photographing each area until you have covered the entire surface of the object.
The second part occurs in post-processing using software like Photoshop. Follow these steps to merge the images and achieve uniform sharpness:
1. Under the “File” menu, go to “Scripts” and select “Load Files into Stack.”
2. In the dialog box, click “Browse” and choose the relevant image files. Enable the “Automatically Align Sources” option and click “OK.”
3. Once the images load into the layers panel, select all of them.
4. Navigate to the “Edit” menu and select “Auto-blend layers.” In the dialog box, choose the “Stack Images” option and click “OK.”
If executed correctly, you will have a final image where the entire product appears sharply focused, eliminating any inconsistencies in detail from front to back. Minor imperfections can be easily cleaned up using the spot healing tool in Photoshop or similar post-processing software.
7. How to Edit Lifestyle Product Photos
Achieving outstanding lifestyle product photos doesn’t end with the capture process; post-processing plays a crucial role in refining and enhancing the images. Editing allows you to fine-tune the visuals, ensuring that the products appear flawless and enticing to potential buyers.
First and foremost, evaluate your images for any unnatural color casts, such as blue or orange hues, which may result from different lighting conditions. To rectify this, utilize color correction techniques during the editing process.
If you are using Adobe Photoshop, open the image in Adobe Camera Raw. Under the “White Balance” section, experiment with various presets, such as Daylight or Fluorescent, until the colors appear accurate and natural.
Additionally, make necessary adjustments to exposure and contrast to achieve a well-lit image. While enhancing these aspects, refrain from excessive tweaking, as it may lead to colors that deviate from the product’s appearance in real life.
Another crucial step in editing lifestyle product photos involves removing dust, blemishes, or imperfections. Fortunately, Photoshop offers several tools designed to facilitate this process. To erase specks and minor imperfections, utilize the Spot Healing Tool. Simply click on the dirt or blemish and watch as Photoshop automatically removes it.
For more significant blemishes, employ the Patch Tool. After selecting the tool, draw a path around the area you wish to remove. Once defined, drag the selection to a clean area that can serve as a suitable replacement. This seamless blending technique erases blemishes effectively, leaving behind a clean and polished image of the product.
Conclusion
Lifestyle product photography goes beyond showcasing products against a plain white background. Its immersive and relatable approach invites consumers to visualize themselves using the products, thus increasing the likelihood of purchases. By following the tips discussed in this article, you can elevate your lifestyle product photography and captivate your target audience.
While it’s crucial to acquire technical skills to execute successful product photography, it’s equally important to develop a unique visual style that sets your work apart from the competition. Experiment with different approaches, make use of props effectively, and master lighting and composition techniques. Moreover, devote time to honing your post-processing skills to perfect your images further.
Remember, lifestyle product photography has the potential to unlock captivating marketing opportunities for your products. Finally, consider leveraging your skills in this field to establish a successful product photography business, catering to the evolving demands of the market.
The article is compiled and compiled by tipcamera.com