
Introduction
When it comes to food photography, achieving a natural light look is highly desirable. However, the challenges of working with natural light, particularly the constantly changing position of the sun, make it difficult to maintain consistency in photography. This is why many professional food photographers turn to artificial lighting techniques, allowing them to have greater control over the lighting in their images. In this article, we will explore the different types of artificial light sources that can be used, discuss considerations before shooting, delve into various lighting styles, examine essential lighting equipment and accessories, and provide you with a recommended lighting set-up to enhance your food photography skills.

Benefits of Artificial Lighting
Artificial lighting offers several advantages in food photography compared to relying solely on natural light. One of the major benefits is the control it provides over the lighting conditions. With artificial lighting, photographers can adjust and manipulate the intensity, direction, and color temperature of the light to achieve the desired look for their images. Additionally, artificial lighting allows for greater consistency between shots, as the photographer has complete control over the light source, unlike natural light that is subject to constant changes.
Types of Artificial Light Sources
When it comes to choosing artificial light sources for food photography, there are several options available. One of the most common approaches is to use a strobe, such as a mono head, which is a self-contained flash unit. Strobes are often preferred for shoots that require higher F-stops, like advertising or product photography, as they offer the necessary power and control. For these types of shoots, photographers may need to rent powerful battery packs and use strobes with high wattage.
However, for editorial type shoots, a 500-watt strobe or even a speedlight with the right modifier can suffice. This makes the lighting set-up more accessible and affordable for those working on projects like blogs, restaurant photography, or foodie magazine editorials. Another option some food photographers prefer is a constant light source, such as an LED light panel. Constant lights allow photographers to see where the shadows are falling before capturing the shot, providing greater control over the final image.
Considerations Before Shooting
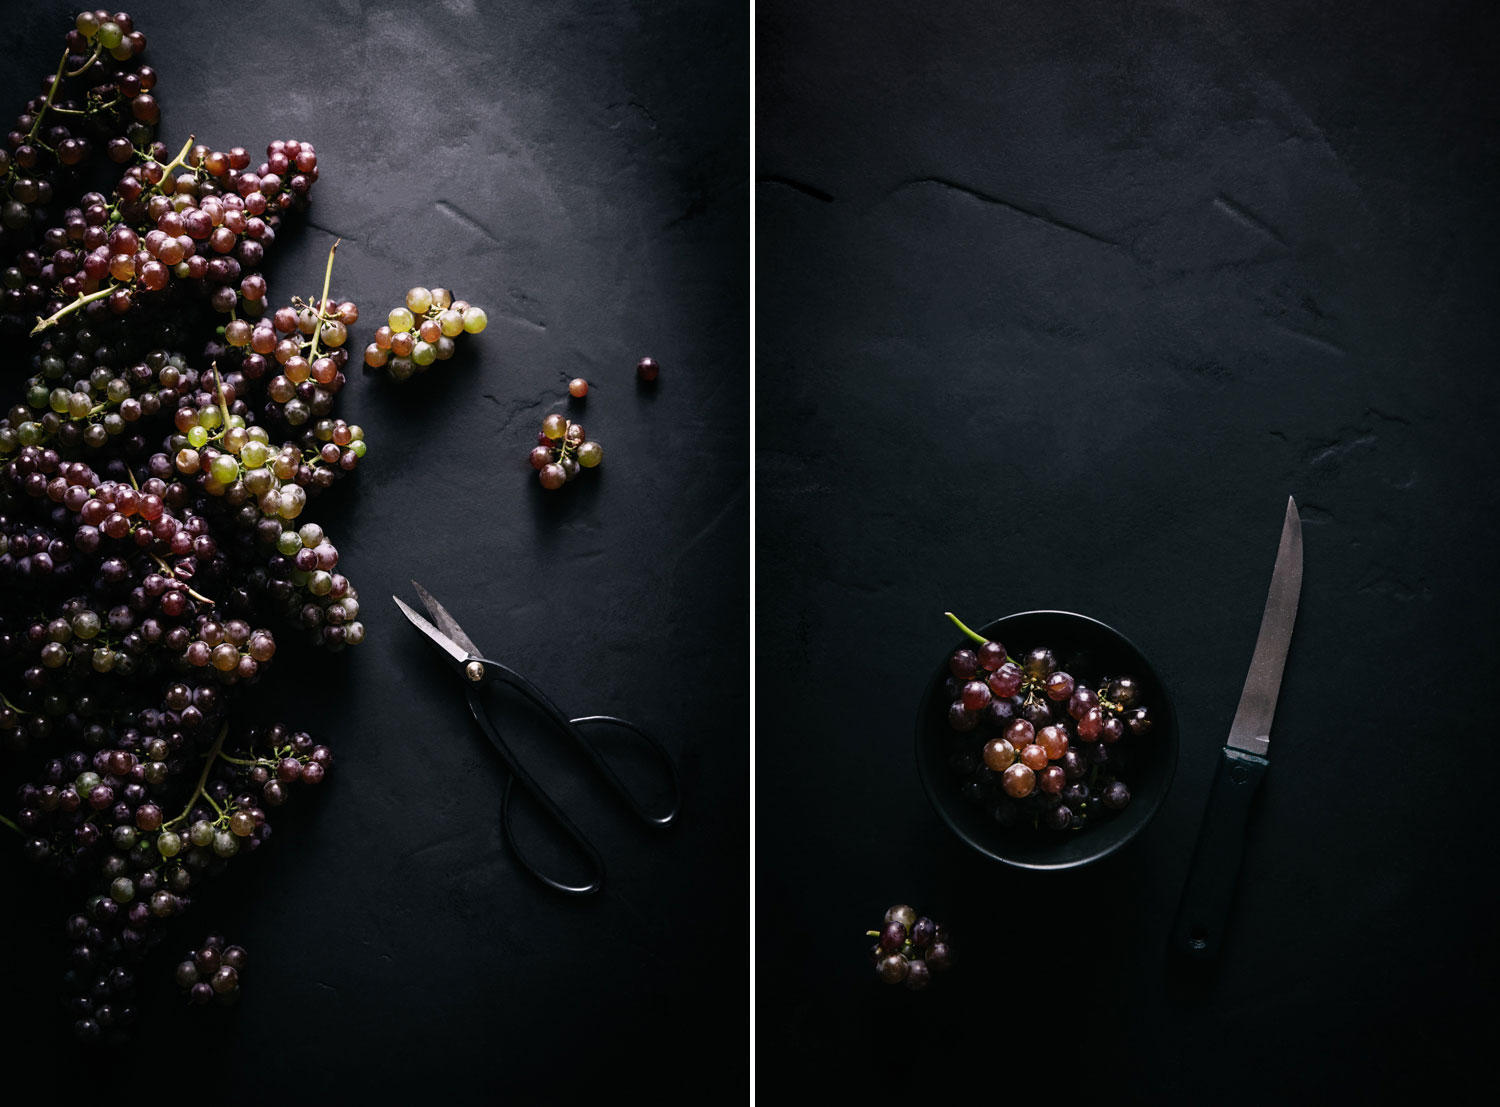
Before starting a food photography shoot, it is essential to have a clear vision of how you want the final image to look. This consideration will guide your choice of lighting styles and techniques throughout the process. Decisions such as whether you want soft and airy lighting or deep shadows with striking contrast will influence your lighting set-up. Additionally, you need to determine whether you want your light to be soft or hard, as this will impact the overall mood and atmosphere of the image. It’s important to keep in mind that the level of contrast between light and dark areas affects the result’s overall drama.
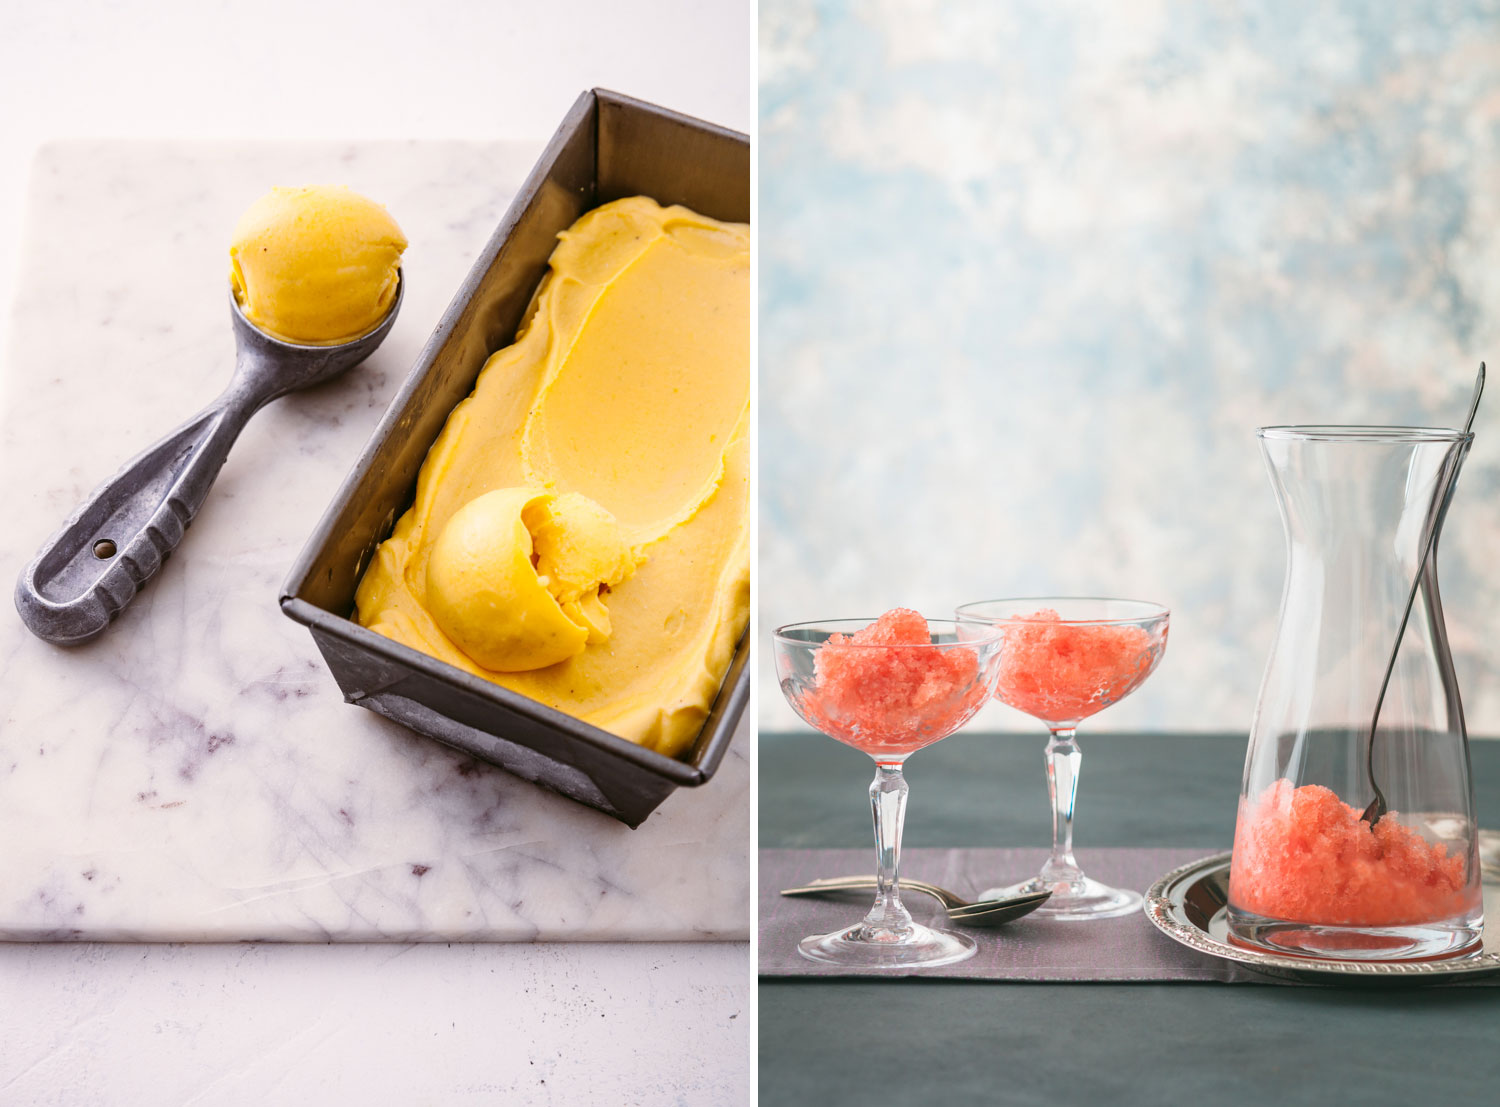
The subject of your photograph often plays a role in dictating the style you choose. For instance, if you are shooting ice cream, which is commonly associated with summer and vibrant colors, soft light or a bright and bold look would be suitable. Regardless of the lighting style, it’s crucial to diffuse the light source to achieve a pleasing blur in the transition between light and dark areas.
Types of Lighting Styles
In food photography, different lighting styles can be utilized to create specific effects and highlight various aspects of the subject. Understanding and experimenting with these styles can significantly enhance your images.
Side Lighting
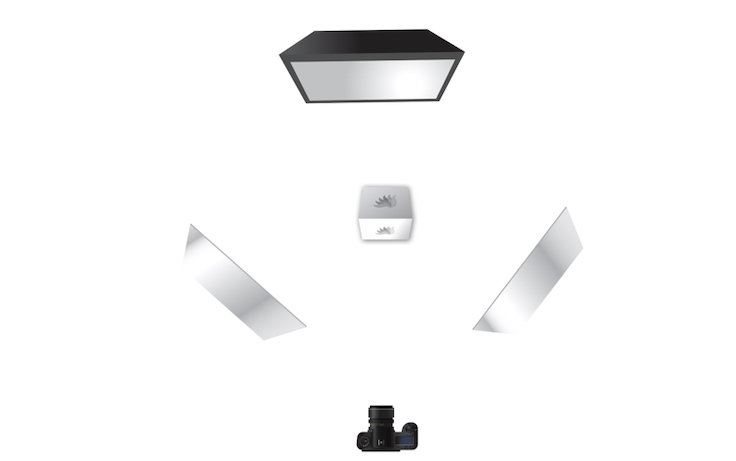
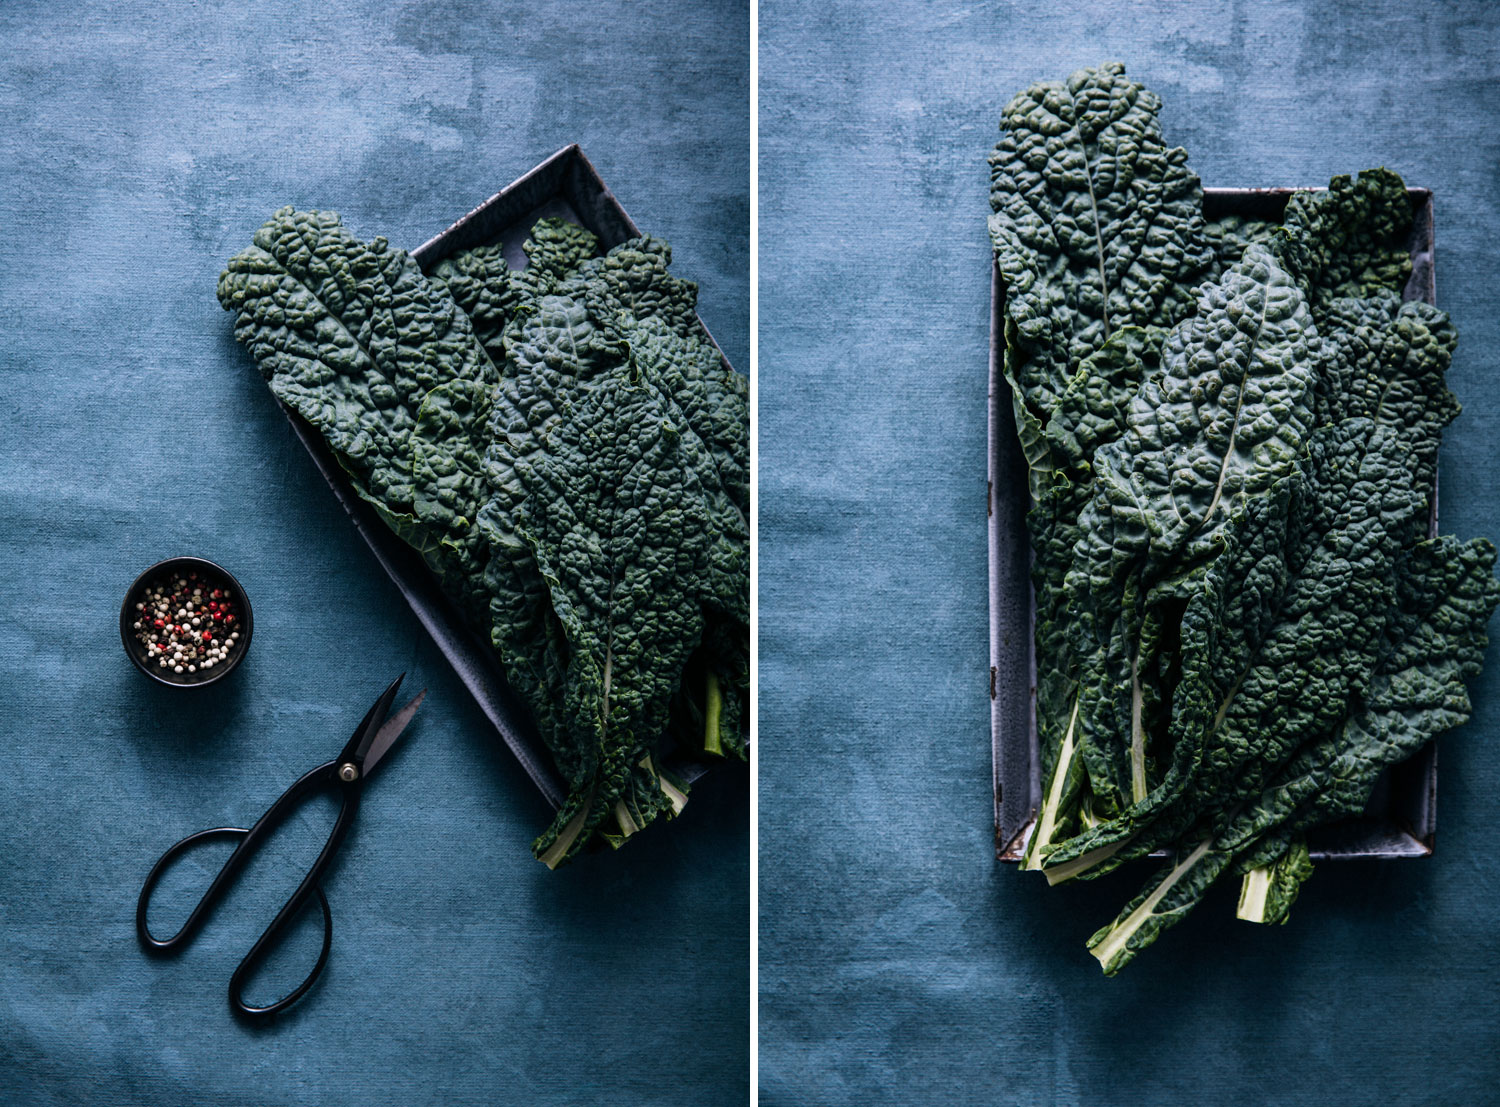
One of the most versatile lighting styles for food photography is side lighting. This technique involves placing a large softbox close to the table to create soft and even lighting on the subject. The size of the softbox is essential, as larger light sources produce softer light. To add dimension and create realistic shadows, a reflector or bounce card can be placed opposite the light source. Adjusting the distance between the reflector and the subject allows photographers to control the amount of shadow and the level of brightness in the image.
Backlighting
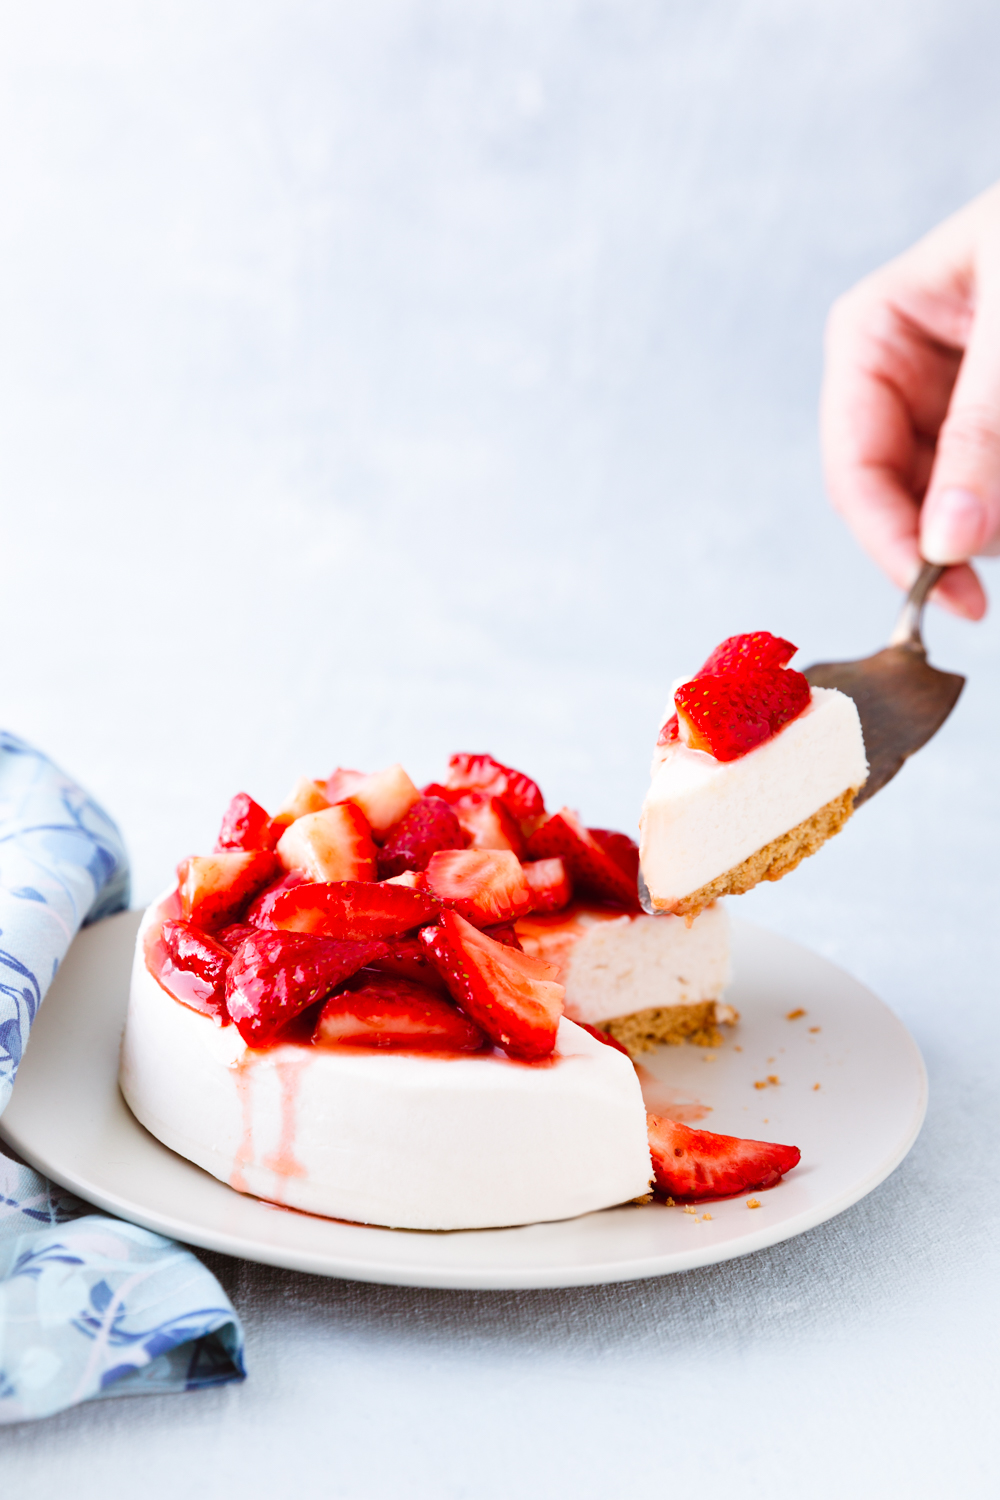
Backlighting is a preferred choice when shooting beverages and soups. It involves positioning the light source behind the subject (at 12:00) to create a sheen and emphasize texture and liquid properties. While backlighting can be flattering to food, it requires careful attention to avoid overexposure at the back of the photo or an excessively washed-out appearance. Additionally, backlighting can accentuate drastic color contrasts that need to be managed effectively for a balanced image.
Side Backlighting
An effective combination of side lighting and backlighting is side backlighting. By positioning the light source at 10:00 or 11:00, photographers can achieve a surface shine similar to backlighting while minimizing the risk of overexposure. This lighting style also provides the advantage of adding depth to the image by creating shadows from an angled light source. The reflector should be placed opposite the light source to bounce some light onto the front of the food. Adjusting the height of the light relative to the scene helps control the direction and intensity of shadows for desired effects.
Other Lighting Styles
While side lighting, backlighting, and side backlighting are versatile and commonly used lighting styles in food photography, there are a few styles that are generally avoided. Front lighting, often used in portraiture, tends to cast unwanted shadows in food photography, resulting in flat and dimensionless images. Overhead lighting also creates a similar effect of flattening the image. These lighting styles are typically not suited for capturing the textures, details, and appetizing qualities that food photography aims to highlight.
Essential Lighting Equipment and Accessories
To achieve the desired lighting effects in food photography, certain essential equipment and accessories are necessary:
1. Softbox: The softbox is one of the most commonly used modifiers in food photography. Its size should be chosen based on the desired softness of the light, with larger sizes producing softer light. The softbox diffuses the light, resulting in smooth and even illumination on the subject.
2. Honeycomb Grid: A dish reflector with a honeycomb grid is a valuable tool for creating stunning contrasts in food photography. The honeycomb grid narrows the light beam, allowing precise control over the lighting direction and preventing light spillage.
3. Diffuser: When working with artificial light sources like strobes or speedlights, a diffuser is crucial to avoid harsh shadows. The diffuser helps mimic the softness of natural light by spreading and scattering the light, resulting in gentle gradations between light and shadow.
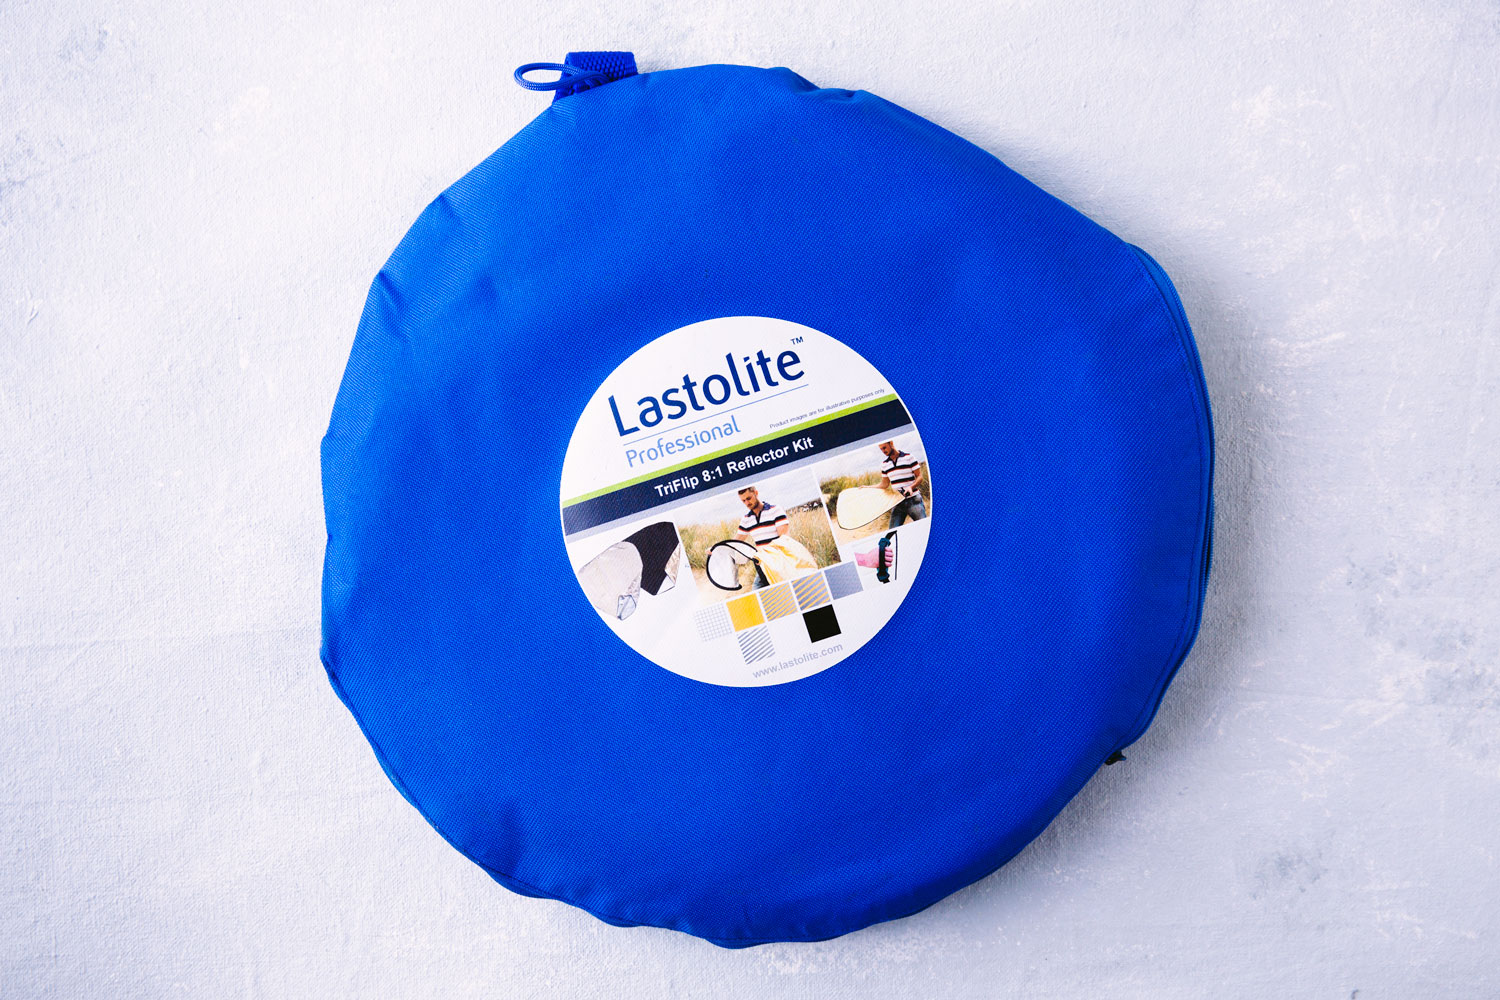
4. Reflectors: Reflectors are used to bounce and redirect light. A 5-in-1 reflector kit is a versatile option that typically includes diffusion material, a silver reflector for brightening, and a gold reflector for adding warmth to the scene. Alternatively, black or white foam core can also be used for absorbing or brightening light, respectively, based on the desired effect.
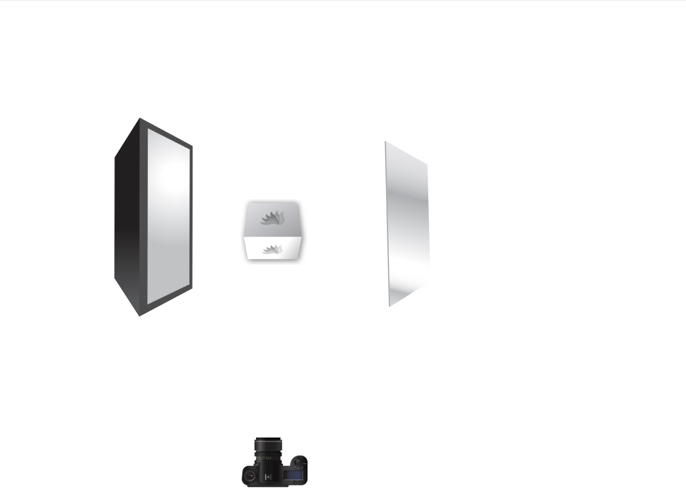
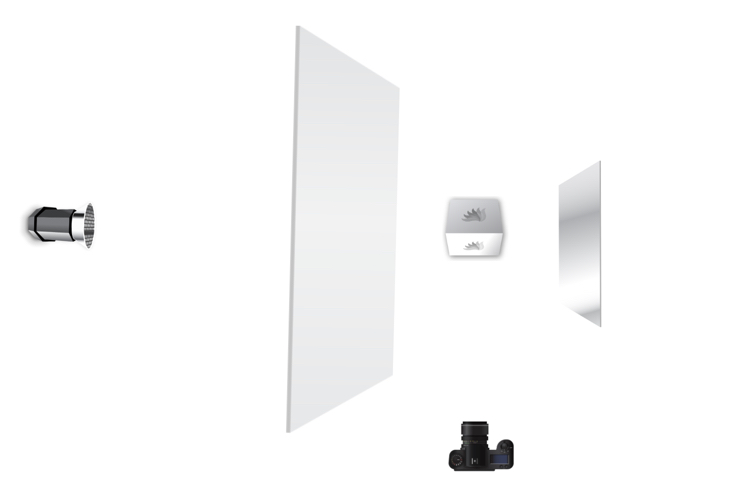
Recommended Lighting Set-Up
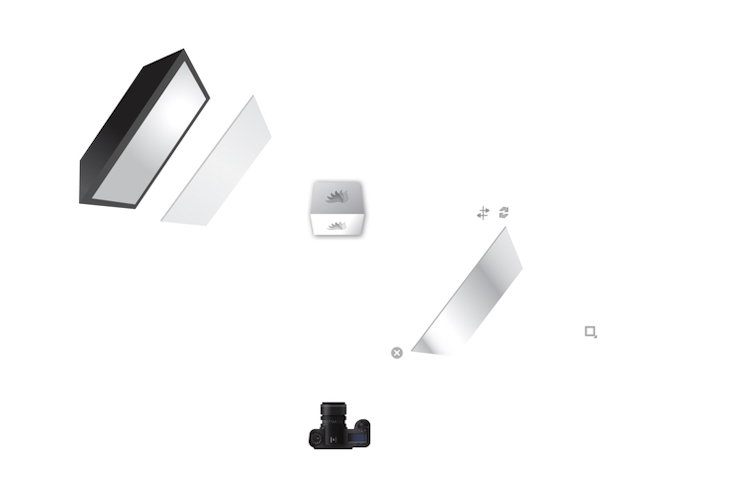
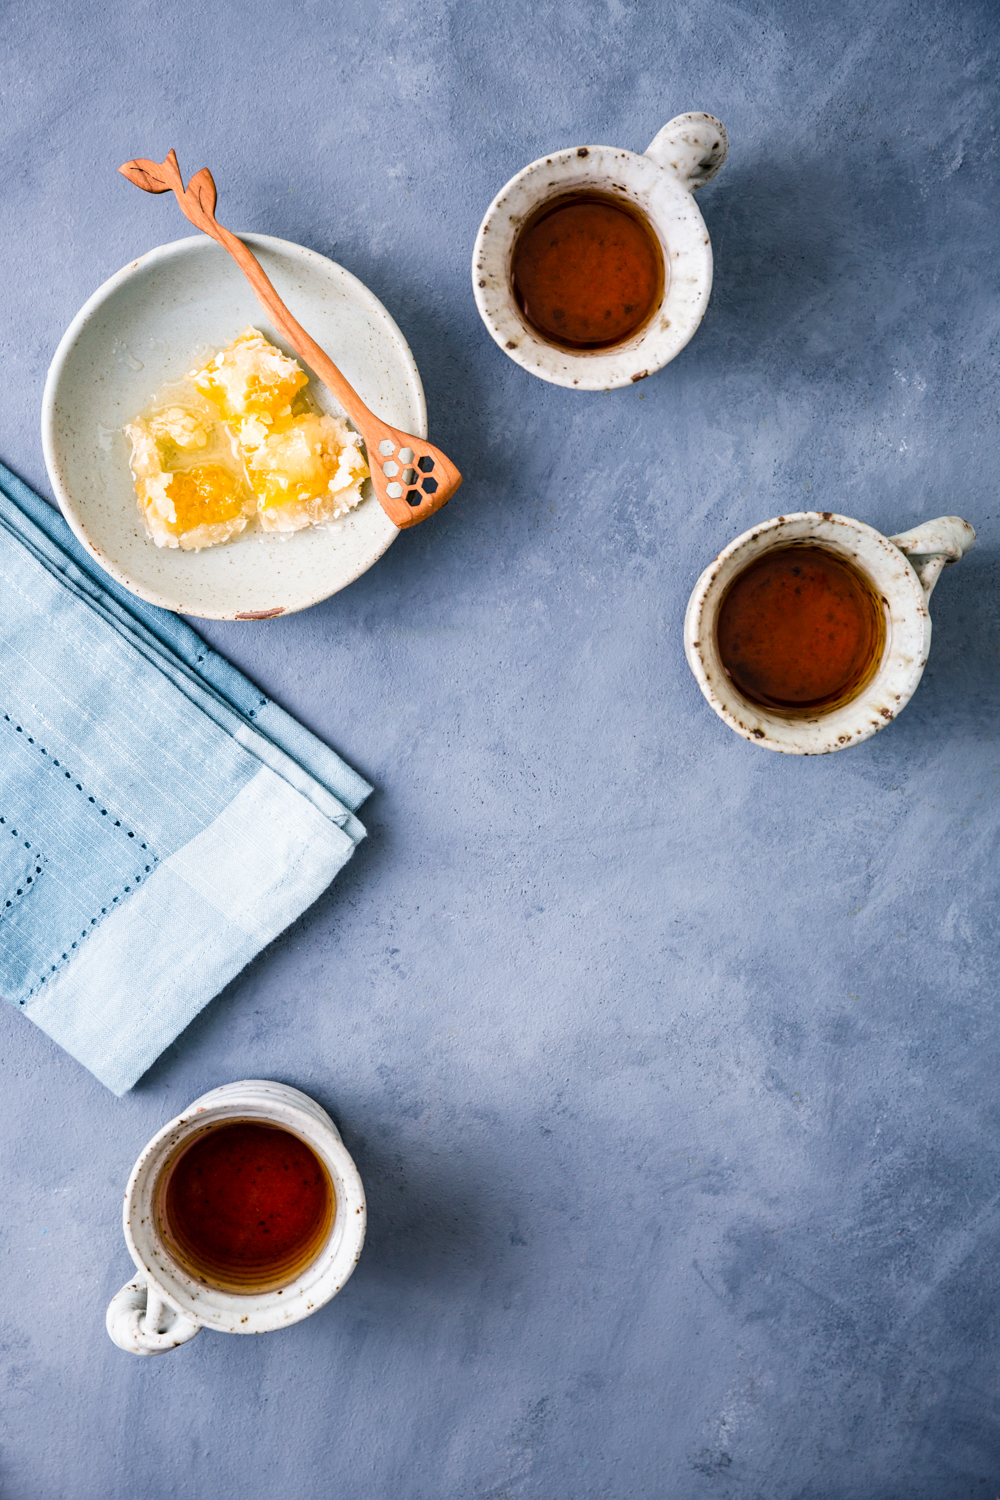
One recommended lighting set-up for food photography involves using a dish reflector with a honeycomb grid. This method allows for precise control over the lighting direction while creating stunning contrasts in the image. To achieve a window light effect, place a large diffuser at the edge of the table. This diffuser becomes the main light source, while the dish reflector with the honeycomb grid provides focused and controlled lighting. The size of the diffuser should be substantial to prevent unwanted light spillage.
Conclusion
Artificial lighting offers food photographers the ability to control and manipulate lighting conditions to achieve consistent and desired results. By understanding the different types of artificial light sources, considering the desired final image look, and experimenting with various lighting styles, photographers can enhance their food photography skills. With essential lighting equipment and accessories, such as softboxes, honeycomb grids, and reflectors, photographers can achieve stunning images. Applying the recommended lighting set-up, utilizing a dish reflector with a honeycomb grid and a large diffuser, can help mimic the beautiful softness of window light. With practice and an understanding of lighting techniques, photographers can elevate their food photography and create visually appealing images.
The article is compiled and compiled by tipcamera.com