
Introduction
ISO is a crucial aspect of photography that determines the sensitivity of a camera’s sensor to light. It is one of the three main components of the exposure triangle, working in conjunction with shutter speed and aperture. Understanding ISO and how to control it is paramount to achieving excellent image quality in various lighting situations.
The Importance of Adjusting ISO
When capturing images, it is essential to adjust the ISO setting to achieve the desired exposure. In bright light conditions, it is recommended to keep the ISO low to prevent overexposure. In contrast, in low light or fast-action scenarios, increasing the ISO allows for faster shutter speeds, reducing the chances of capturing blurry images.

Understanding ISO in the Exposure Triangle
The exposure triangle consists of three critical elements: ISO, shutter speed, and aperture. ISO helps balance the exposure alongside these other two factors. The ISO setting determines how sensitive the camera’s sensor is to light, while shutter speed controls the duration of the exposure, and aperture manages the amount of light entering the lens.
The Trade-Off with Higher ISO
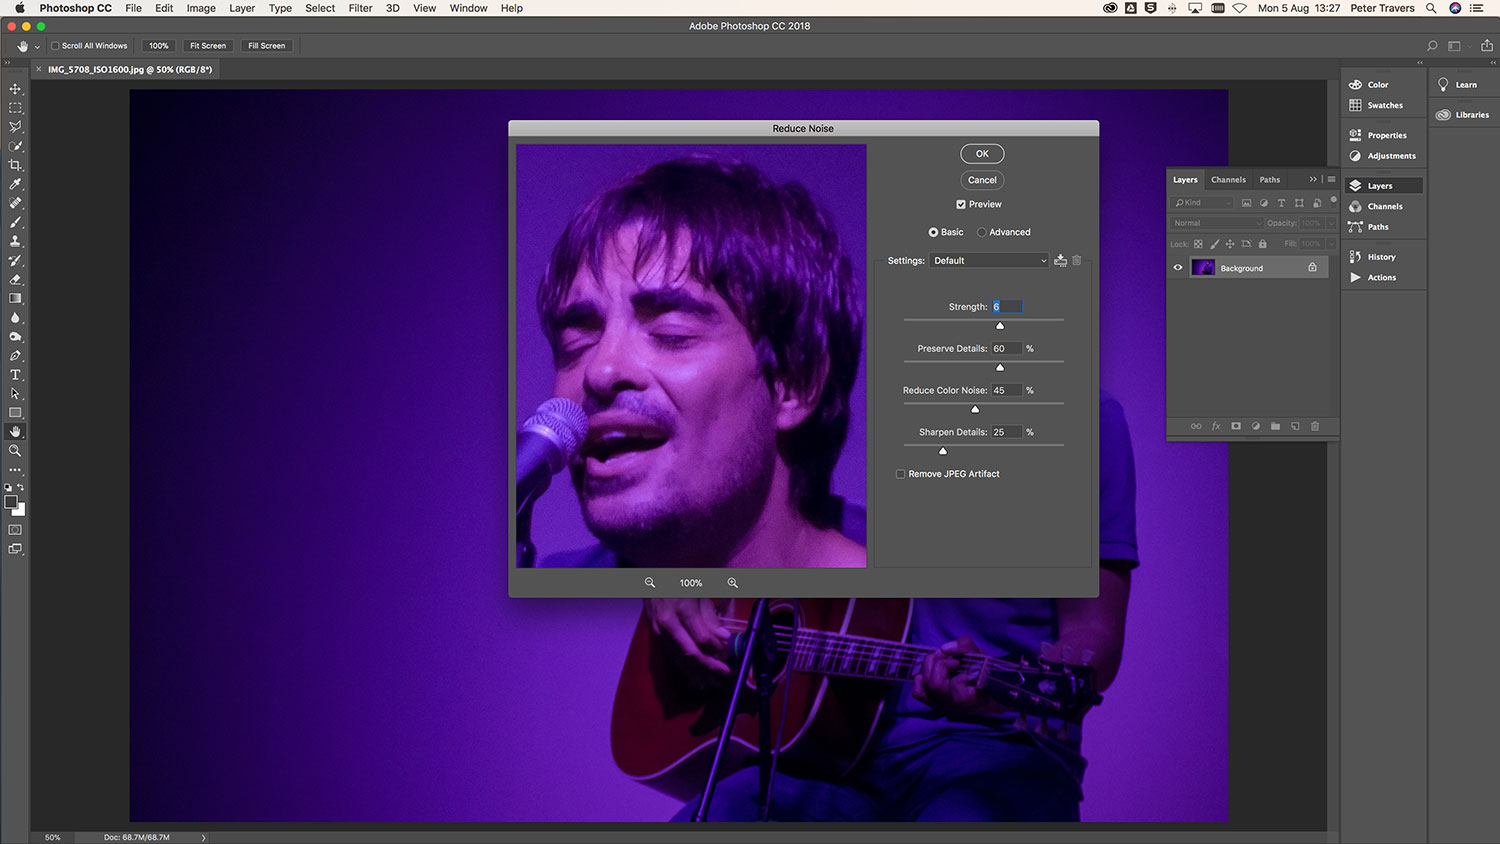
While increasing the ISO allows for faster shutter speeds and better exposure in low light conditions, there is a trade-off. Higher ISO settings introduce more digital noise, resulting in a grainy appearance in images. It is important to find a balance between achieving a proper exposure and maintaining acceptable noise levels.
APS-C vs. Full-Frame Sensors
Noise tends to be more noticeable in smaller APS-C sensor cameras compared to larger full-frame sensors. This is primarily due to the physical size of the sensors and the resulting pixel density. APS-C sensors have smaller individual pixels, making noise more apparent. Full-frame sensors, on the other hand, offer larger pixels and better overall noise performance.
Using High ISO for Specific Scenarios
In certain shooting situations, it may be necessary to increase the ISO beyond the base setting to achieve the desired outcome. Here are two specific scenarios where higher ISO can be advantageous:
Scenic Shots with Narrow Apertures
When shooting landscapes or architectural subjects, a narrower aperture (higher f-stop) is often preferred to maximize depth of field. However, this reduces the amount of light entering the camera. By increasing the ISO, a brighter exposure can be achieved while maintaining a fast enough shutter speed, eliminating the need for a tripod.
Fast Action or Low-Light Conditions

When capturing fast-moving subjects or shooting in low-light environments, a higher ISO setting enables a faster shutter speed to freeze motion without introducing blurriness. This is particularly essential when shooting handheld, as any movement can result in unwanted camera shake. Adjusting the ISO accordingly ensures sharper images in challenging lighting situations.
How to Adjust ISO on Different Cameras
The method of adjusting ISO may vary depending on the camera model. Here are some common ways to change the ISO sensitivity:
- Dedicated ISO Button: Certain camera bodies feature a dedicated ISO button that allows for quick adjustments.
- Dedicated ISO Dial: Some Fujifilm cameras, for example, incorporate a dedicated ISO dial, enabling straightforward ISO changes.
- Quick-Menu Button or Touchscreen Interface: Many modern cameras provide a quick-menu button or touchscreen interface for easy access to ISO settings.

Understanding the ISO Range
The ISO range varies depending on the camera system. Typically, it starts at a base ISO value of 100 and can go as high as 25,600 or even beyond. The specific ISO range offered depends on the camera’s capabilities and intended usage.

Optimal ISO Settings
To achieve the best image quality in different lighting conditions, it is essential to understand optimal ISO settings:
Low ISO for Daylight Shooting
When shooting in bright daylight, it is advisable to maintain a low ISO setting, such as ISO 100. This helps to ensure accurate colors, reduce noise, and produce images with the highest possible quality.

Increasing ISO in Lower Light Conditions
In situations where the available light is limited, it may be necessary to raise the ISO setting to compensate. For example, on an overcast day, increasing the ISO to 400 or 800 can help maintain a proper exposure.
Conclusion
Understanding ISO and its relationship with shutter speed and aperture is crucial to capturing high-quality photographs. By adjusting the ISO appropriately, photographers can control the amount of light entering the camera’s sensor, resulting in well-exposed images with minimal noise. Whether shooting in bright daylight or challenging low-light environments, mastering ISO settings is an essential skill for all photographers.
Additional Resources
For more in-depth information related to ISO and photography, check out the following resources:
- What is ISO?
- How to Understand ISO Settings
- Understanding the Exposure Triangle
Continue exploring the world of photography and stay up to date with the latest camera deals, product advice, and photography news by subscribing to our newsletter.
The article is compiled and compiled by tipcamera.com