
Introduction
Night photography is a challenging yet highly rewarding genre of photography. The ability to transform a dark landscape into a majestic image is a remarkable feeling. However, it is no secret that night photography is more demanding than most other genres of nature photography. Not only do you need a solid understanding of camera settings, but you also need to navigate menus in the dark. In this article, we will delve into the most common night photography mistakes and provide you with valuable insights on how to avoid them. By following these steps, you can take your night photography to the next level and capture images that leave people in awe.
Mistake 1: Lack of foreground in composition
One prevalent mistake in night photography is the failure to include a foreground in the composition. It is all too common to see night photographs that primarily focus on the night sky, without incorporating elements in the foreground. Unless you are specifically capturing deep space photography, omitting a foreground can detract from the overall impact of the image. A strong composition includes a well-defined foreground that adds interest and guides the viewer’s eyes through the image. The inclusion of a foreground can transform a plain night sky into a captivating scene.

For example, consider two images: one with a barren night sky and another that incorporates a prominent foreground element. The second image is undoubtedly more visually appealing, and the primary reason is the stronger composition achieved through the inclusion of a foreground.

Finding a suitable foreground that contributes to a strong composition is undoubtedly challenging in landscape photography. The difficulty is amplified when working in the dark. One useful approach is scouting the location during daytime hours to identify potential compositions that can be utilized later on. Look for elements that can lead the viewer’s eyes through the image and add depth to the overall composition.
Ultimately, including a foreground is not enough to create a great night photograph. It is essential to consider the balance between the foreground and the rest of the image. An underexposed or silhouetted landscape can be more distracting than helpful. The purpose of incorporating a foreground is to convey a story and guide the viewer through the image. Ensure that the landscape is well-exposed and contributes to the overall narrative rather than detracting from it.

Consider the following examples: one with a silhouetted landscape and another with a well-exposed landscape. The latter is more engaging and impactful as it provides necessary detail and context to the image.

Mistake 2: Unsuitable shutter speed for capturing stars
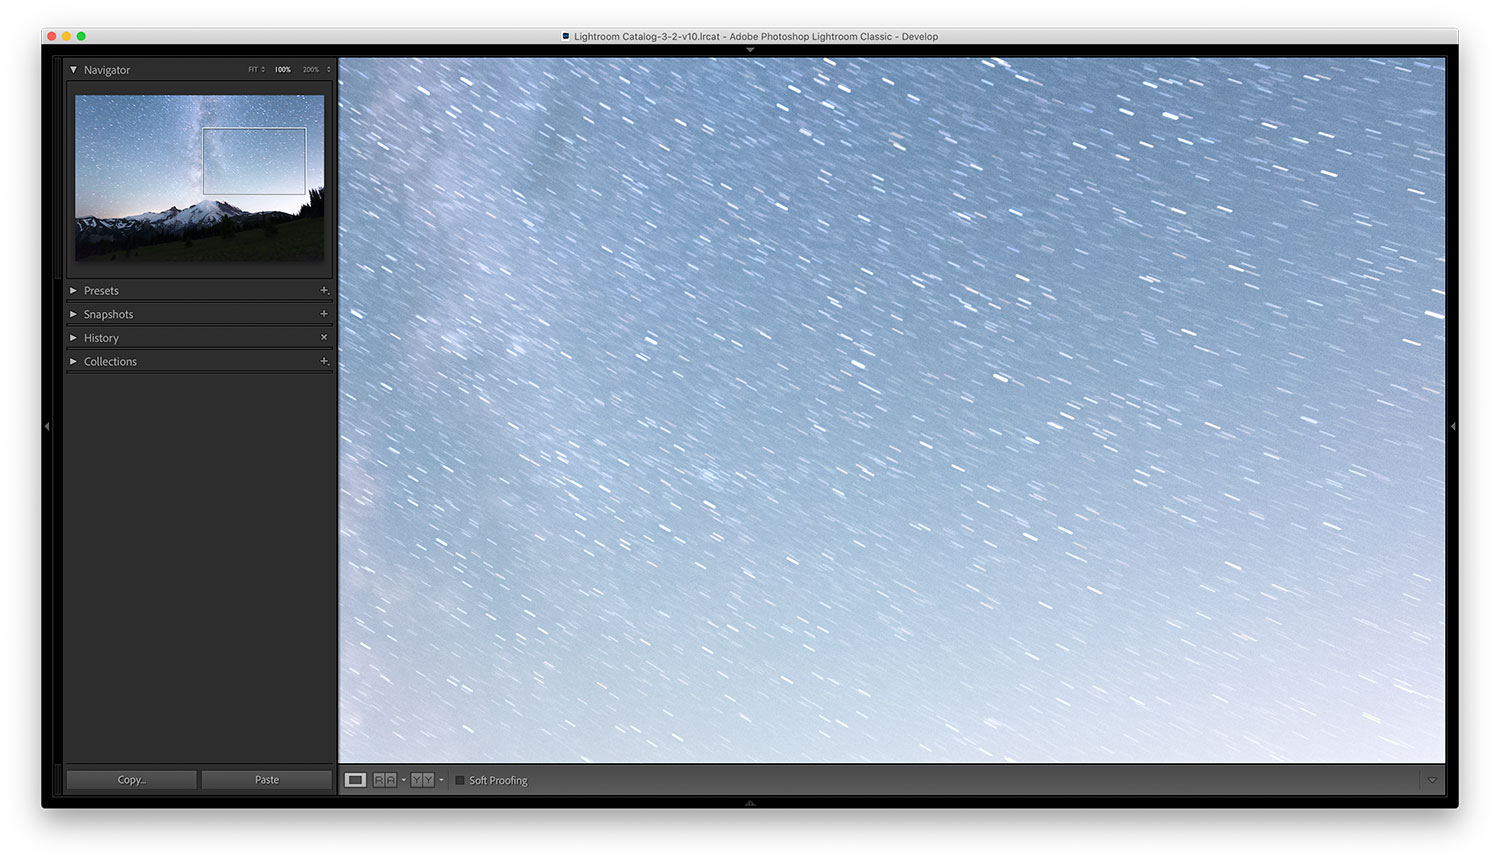
Properly capturing stars in a night photograph requires careful consideration of the shutter speed. Shutter speed has a direct impact on the sharpness of stars. It is crucial to avoid using an excessively long shutter speed, which can result in star trails rather than sharp individual stars.
Star trails occur due to the Earth’s rotation, causing the stars to appear as streaks in the image over an extended exposure period. The longer the shutter speed, the more pronounced the star trails become. While photographing star trails intentionally can be an exciting technique, it is not ideal for regular night photography where the goal is to capture sharp stars.
To achieve sharp stars, pay close attention to the selected shutter speed. Using a slow shutter speed is a common night photography mistake that can diminish the impact of the image. Instead, aim for a sufficiently quick shutter speed that maintains individual star clarity while avoiding excessive trailing.
It is important to note that the ideal shutter speed for capturing stars depends on your specific lens and camera. Two common rules to assist in determining the maximum shutter speed are the “500 Rule” and the “NPF Rule.” These rules provide guidelines for calculating the appropriate shutter speed based on your equipment, ensuring that you can capture sharp stars in your night photographs.
Mistake 3: Excessive noise from high ISO
Photographing in low-light conditions necessitates the use of a high ISO setting to capture enough light. However, a high ISO can introduce unwanted noise into the image, reducing the overall quality. While some degree of noise is inevitable in night photography, it is crucial to strive for the cleanest possible image.
Ensuring optimal ISO settings requires an understanding of the specific conditions and your camera’s capabilities. The amount of noise can vary depending on factors such as moon phase and general lighting conditions. It is advisable to use the lowest ISO setting that still allows you to maintain an optimal shutter speed.
On nights with a full moon or sufficient ambient light, it may be possible to employ a lower ISO, resulting in reduced noise in the final image. Understanding how your camera performs at different ISO settings is crucial for making informed decisions and achieving the best results in night photography.
It is important to note that noise reduction techniques can be applied during post-processing to minimize any noise that may be present in the image. However, reducing noise in-camera by optimizing ISO settings is preferable and can lead to better image quality.
To gain a deeper understanding of ISO in digital photography, consider exploring the recommended reading material mentioned below:
Recommended Reading:
Introduction to ISO in Digital Photography
Mistake 4: Overreliance on autofocus in low light
One of the most common mistakes in night photography is attempting to use autofocus in low-light conditions. Autofocus functions are rarely effective as cameras struggle to see in the dark. As a result, relying on autofocus often leads to blurred or improperly focused images.
In order to achieve sharp focus in night photography, manual focusing is essential. While manual focus may seem intimidating to some, it is a skill worth mastering as it is advantageous not just in night photography but also other genres.
To focus manually in low-light conditions, follow the steps outlined below:
- Switch your lens to manual focus mode (locate the small switch on your lens for this)
- Activate Live View mode on your camera
- Zoom in on a star or distant light source using the camera’s Live View function (do not use the actual optical zoom)
- Adjust the focus ring on the lens until the star appears as small as possible, indicating the sharpest focus point
- Capture a test shot and review the image preview, zooming in to ensure the sky is sharp. Make any necessary adjustments to achieve optimal focus

Many tutorials may suggest setting your lens to infinity focus, assuming it will achieve the sharpest results. However, this approach does not account for lens variations, as the sharpest point may not always be exactly at infinity. Testing your lens and marking the precise point of optimal focus with a pen can help ensure consistent results in night photography.
To gain a comprehensive understanding of focusing techniques in night photography, refer to the detailed guide below:
How to Focus in Night Photography
Conclusion
Night photography, while challenging, presents incredible opportunities to create breathtaking images. By avoiding common mistakes, you can significantly enhance the impact of your night photographs. Incorporating a well-defined foreground in your compositions adds depth and interest, while ensuring a well-exposed landscape contributes to the overall narrative. Carefully managing shutter speed to capture sharp stars and understanding the impact of ISO on noise levels are crucial considerations. Embracing manual focus techniques in low-light conditions allows for precise control over focus and sharpness. By being aware of these common mistakes in night photography, you can elevate your skills and capture compelling images that leave a lasting impression on viewers.
The article is compiled and compiled by tipcamera.com