
Introduction
In this article, we will explore a comprehensive and step-by-step process for editing food photography in Lightroom. With years of experience in editing food photos, the author shares unique techniques and insights gathered through countless hours behind the computer. The workflow also includes a hands-on example, allowing you to witness the precise effects of each editing step in real-time.
While creativity and style play a role in food photography editing, the main goal is to keep the food looking fresh and appetizing. Natural-looking subjects tend to have a greater impact. Furthermore, this workflow can be adapted to other editing programs such as Capture One, ON1 Photo RAW, or Luminar AI/Neo.
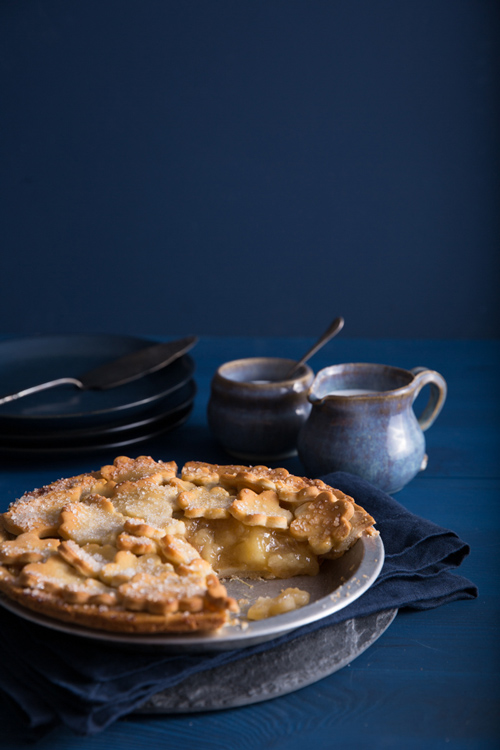
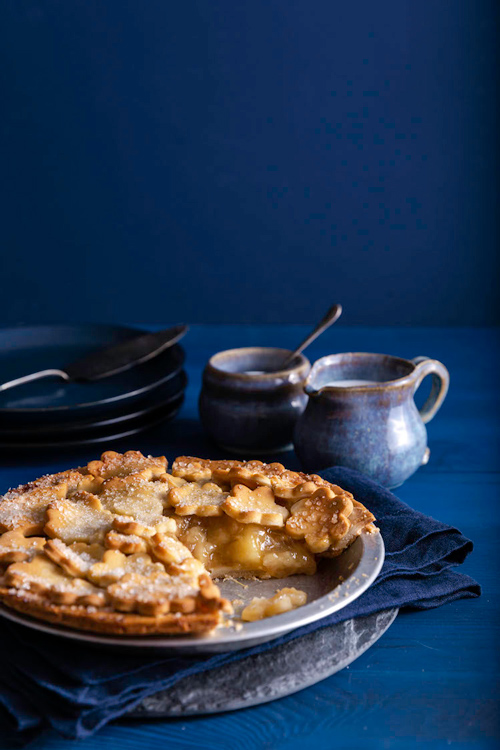
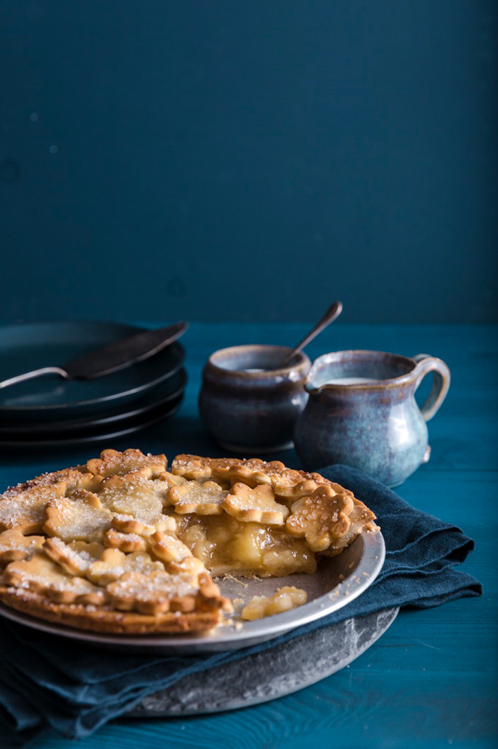
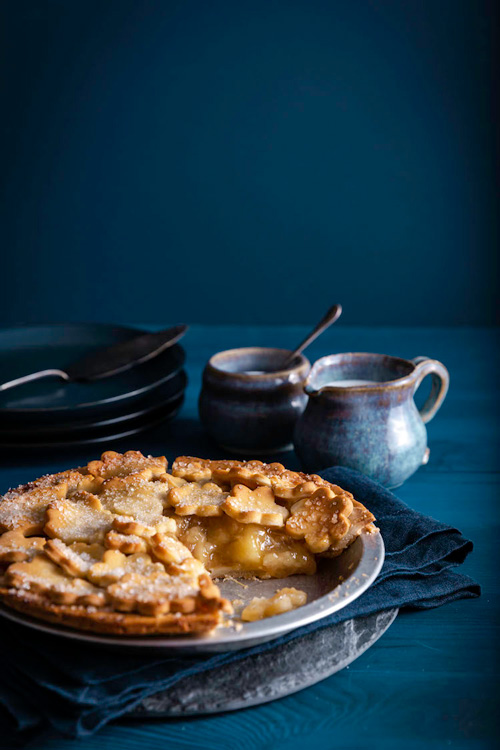
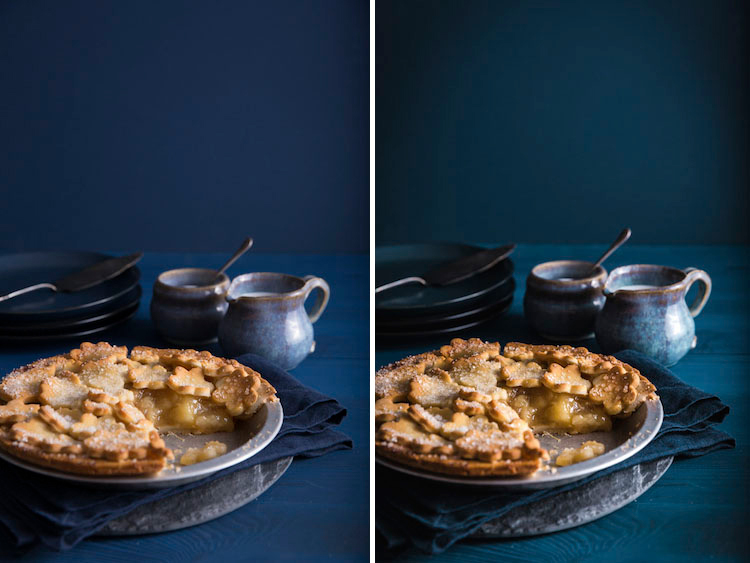
The image that will be edited throughout this article is an apple pie straight out of the camera. As a result, the photo lacks contrast and visual appeal. Let’s dive right into the first step of the editing process.
Step 1: Crop and straighten your food photo
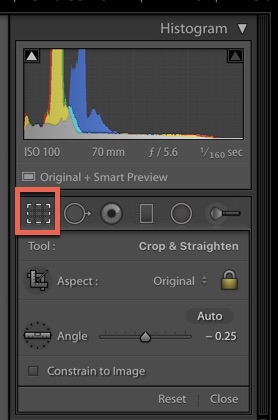
The initial step before making exposure and color adjustments to your food photo is to handle any necessary cropping and straightening. Cropping not only allows you to refine the composition but also eliminates any unnecessary spaces or distractions within the frame.
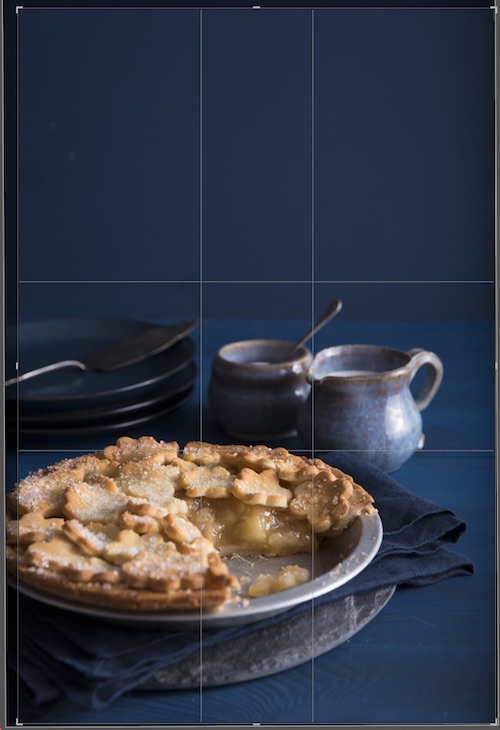
Start by using the Crop tool in Lightroom. Ensure that the horizon line is straight by evaluating the crop gridlines. If adjustments are needed, simply drag the edge of the crop overlay to achieve a perfectly aligned image. Additionally, consider the overall composition of the photo and utilize the Crop tool to obtain a well-balanced result.
For the example of the apple pie photo, a slight crop on the left-hand side was applied to remove a portion of the pie, enhancing its visual impact.
Step 2: Enable lens corrections
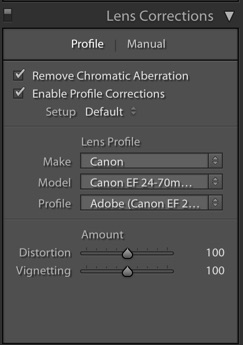
Every lens introduces some degree of distortion, vignetting, or aberration. Lightroom’s Lens Corrections panel is designed to automatically counteract these issues and provide a more accurate representation of the subject.
In most cases, Lightroom recognizes the make and model of the lens used. However, manual selection of the appropriate lens profile is available if necessary. It is advisable to check the “Remove Chromatic Aberration” and “Enable Profile Corrections” boxes to optimize the correction process.
In situations where the automatic corrections do not yield satisfactory results, you can manually adjust the distortion or vignetting correction via the Amount sliders. This allows for precise fine-tuning of the corrections applied to each photo.
Step 3: Select the right white balance
Accurately displaying the subject is crucial in food photography. Whenever possible, it is recommended to set the white balance in-camera or capture a photo with a gray card placed in the scene. These actions help neutralize any unwanted color casts caused by the lighting setup.
If white balancing was done in-camera, this step can be skipped. However, if a gray card was used, Lightroom’s Eyedropper tool comes into play. Simply click on the gray card within the scene, allowing Lightroom to instantly white balance the shot and provide a perfect base for additional color edits.
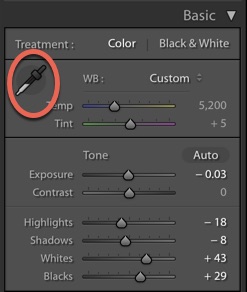
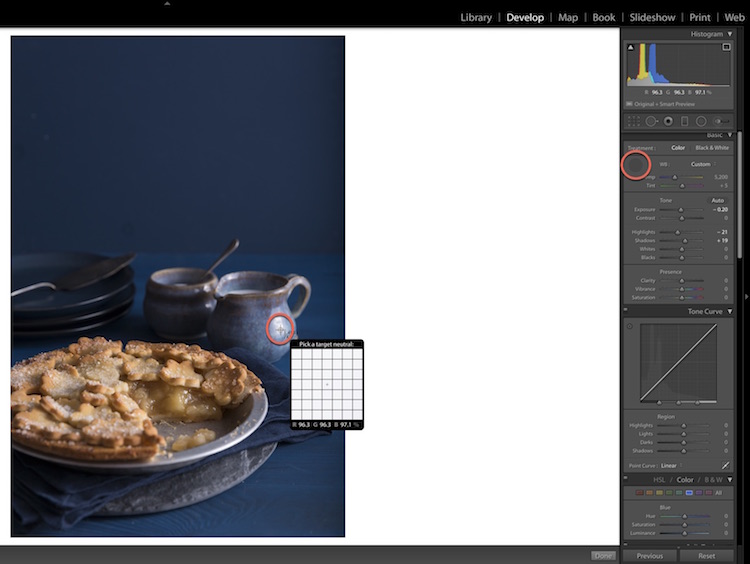
If no white balancing was performed, Lightroom also offers the option to adjust the white balance within the software. Using the Eyedropper tool, click on an area in the image that should appear neutral, such as gray or white. Though this method may not be as precise as using a gray card, it often yields satisfactory results. If further adjustments are required, the Temp and Tint sliders can be used to fine-tune the color temperature.
Importantly, white balance can also be utilized creatively to evoke different emotions. A slightly imperfect white balance might be preferable for specific looks. Experimentation is encouraged, and photographers can favor cooler or warmer temperatures depending on their desired outcome.
Step 4: Adjust exposure and contrast
As we move forward in the editing process, adjusting the tones of the image becomes essential. Lightroom offers various sliders to modify exposure and contrast, ensuring the photo achieves the desired visual effect.
The Exposure slider allows for the overall adjustment of the image’s brightness. By carefully observing the changes, photographers can determine the optimal exposure adjustments that enhance the tonal range while maintaining crucial details. Artistic goals should also be taken into consideration; for a darker and moody shot, decreasing the exposure may be preferred, while a brighter and airy shot might require an increase in exposure.
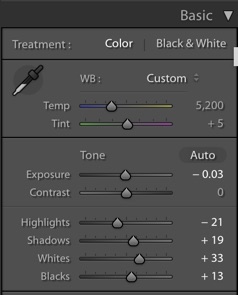

To achieve more precise tonal adjustments, Lightroom provides sliders for Highlights, Shadows, Whites, and Blacks. These sliders contribute to the subjective nature of editing, allowing for customized adjustments to suit individual preferences. In the case of the apple pie photo, adjustments were made to decrease the brightness of highlights and shadows, with a simultaneous increase in whites for a balanced effect.
Lastly, the Contrast slider provides an additional boost to the image. Since RAW photos tend to appear flat, adding contrast aids in achieving a more visually appealing outcome.
Step 5: Adjust the Clarity, Vibrance, and Saturation
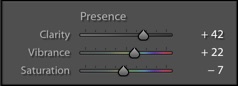
When editing food photos in Lightroom, the Clarity slider holds significant importance. It introduces contrast specifically to the midtones, resulting in a visually pleasing effect. However, excessive application of the Clarity slider can lead to dry and unappealing food visuals. It is crucial to exercise moderation when altering this slider. For the apple pie photo, a Clarity setting of 42 was applied.
Vibrance is another essential slider that enables subtle color enhancements without creating an overwhelming or artificial appearance. Slight adjustments to the Vibrance slider contribute to the overall enhancement of colors. The Saturation slider can also be utilized; however, caution must be exercised to avoid oversaturation, which may lead to unsightly images. A conservative approach is recommended, granting a subtle boost to saturation. In the case of the apple pie photo, a slight reduction in saturation was applied to deemphasize the presence of blues.
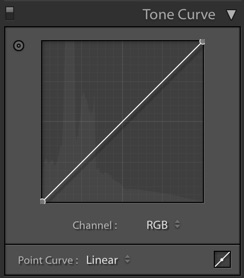
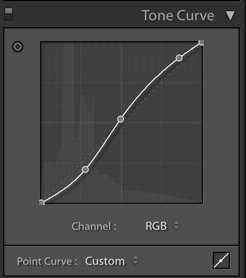
The Tone Curve panel in Lightroom can also be employed to fine-tune contrast adjustments. While delving into the intricacies of the Tone Curve exceeds the scope of this article, it is worth understanding the basics. The Tone Curve maps the tonal distribution within the image, allowing precise manipulation of different tonal areas.
By selecting specific points on the curve and adjusting them, photographers gain control over various aspects of the image. For example, raising the bottom left portion brightens the darkest tones, while lowering the top right portion darkens the lightest tones. Careful adjustment of the tone curve enhances contrast and allows for a personal touch in image editing.
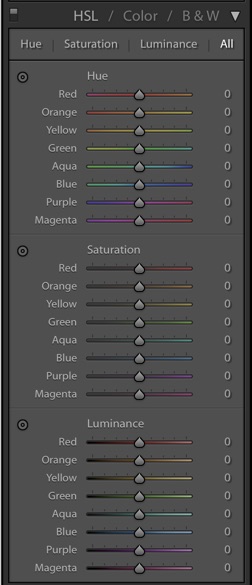
Step 6: Do some color adjustments with the HSL panel
The HSL panel in Lightroom stands for Hue, Saturation, and Luminance. It offers extensive control over color balance and is a crucial component in achieving accurate and visually pleasing food photography.
The Hue section enables photographers to target individual colors and make subtle shifts. For example, greens often require fine-tuning to look more realistic. By adjusting the Green slider slightly to the left or right, a natural appearance can be achieved. Experimenting with these sliders is key, as every image requires individual adjustments to cater to specific editing styles.
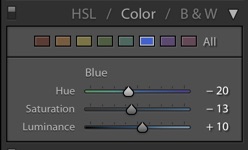
In the case of the apple pie photo, a minor adjustment was made to the Blue slider to correct a slight magenta tint in the blues.

The Saturation section allows saturation adjustments on a per-color basis. Individual color saturation can be increased or decreased accordingly, ensuring that certain hues do not overpower the image. The Luminance section controls the brightness of specific colors, providing further refinement to the visual appeal of the photo.
It is crucial to experiment with these sliders to strike the desired balance between colors. The colors must complement one another while reflecting the intended mood of the photo. The apple pie photo received adjustments in HSL, resulting in more realistic greens, lighter blues, and subtle desaturation.
Step 7: Reduce any noise
Noise refers to unwanted speckling of color and light that can be present throughout an image. While well-exposed files at low ISOs typically minimize noise, it becomes more problematic in underexposed files or high ISO situations.
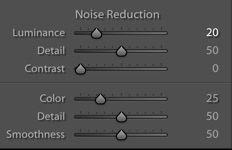
Lightroom provides a Noise Reduction section, allowing photographers to preserve image quality and reduce noise effectively. Adjustment sliders for Luminance and Color can be increased to continuously refine the image. However, it is crucial to exercise caution and carefully monitor the changes, as excessive use of these sliders can lead to a plastic-like appearance.
In the case of the apple pie photo captured at a low ISO, only a moderate increase in Luminance (set to 20) was applied to uphold the photo’s original quality.
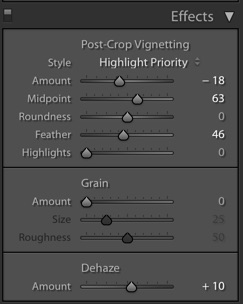
Step 8: Add Post-Crop Vignetting and Dehaze
For food photos with a darker and moodier aesthetic, Post-Crop Vignetting proves to be an invaluable tool. By darkening the corners of the frame, this adjustment technique directs the viewer’s attention towards the subject, enhancing its prominence and impact.
Within Lightroom’s Effects panel, the Post-Crop Vignetting section allows adjustment of the Amount, Midpoint, and Feather sliders. The Amount slider controls the intensity of the darkening effect, while the Midpoint slider determines how far the darkened edges encroach on the center of the photo. Adjusting the Feather slider determines the softness or hardness of the vignette.
For food shots, a softer vignette is recommended, as it preserves a natural feel. In the case of the apple pie photo, a gentle decrease in the Amount slider was accompanied by an increase in the Feather slider, resulting in a subtly enhanced visual composition.
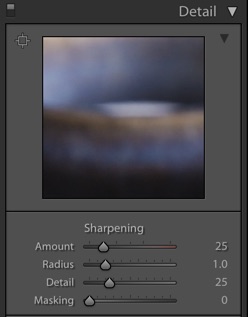
Step 9: Do some sharpening
Sharpening serves as the final editing step for food photos. It adds contrast between pixels and enhances the overall sharpness of the image. It is important to note that while sharpening can refine the appearance of a photo, it cannot compensate for a fundamentally blurry image caused by poor shooting technique.
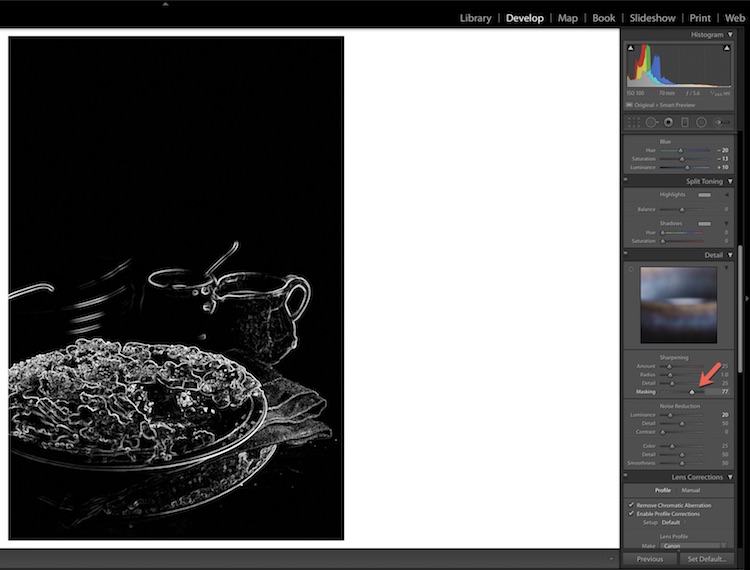
Lightroom provides a dedicated Sharpening section, allowing photographers to control the sharpening effect and make fine adjustments. When sharpening food photos, it is best to focus on the food itself instead of sharpening the props or the background, as the main emphasis should be the subject of the photo.
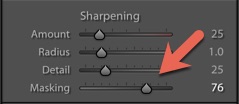
Begin by increasing the Sharpening amount, then use the Masking slider to specifically target the food. By adjusting the Masking slider and observing the accompanying black and white overlay, it becomes easier to discern the areas receiving sharpening adjustments. Fine-tuning the effect can be done by making adjustments to the Sharpening Amount slider while the Masking adjustments remain in place.
Edit food photos in Lightroom: Final words
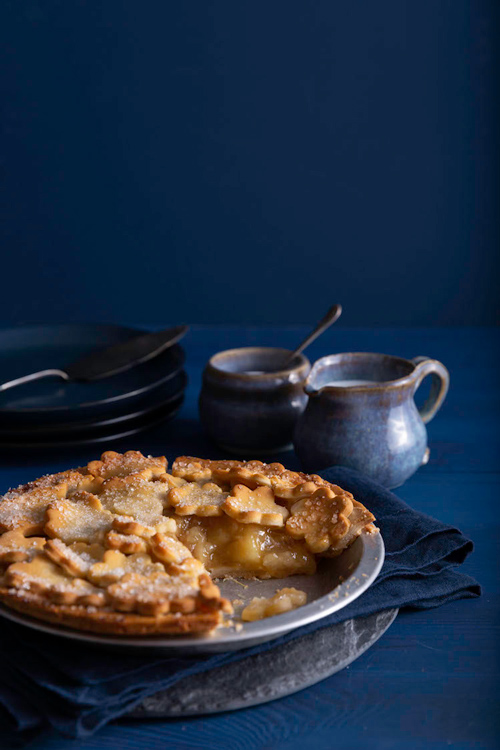
By following this comprehensive editing workflow, the resulting food photo takes on a refined and balanced appearance compared to the original image. Subtle adjustments and enhancements allow for a more visually appealing subject that entices viewers.
When engaging in the editing process, always strive to make your subject appear natural and appetizing. Throughout the various steps, carefully evaluate the final image and ask yourself, “Would I want to eat this food based on how it looks in this photo?” If the answer is a resounding “Yes,” then consider your editing efforts successful.
Now armed with a detailed workflow for food photography editing in Lightroom, you have the opportunity to implement these steps into your own editing practice. Feel free to experiment, adapt, and develop your personal style. Remember, every photo is unique, and the editing process should reflect your artistic vision and creative choices.
Share your experiences, insights, and any additional tips or tricks you have discovered in the comments below. Happy editing!
The article is compiled and compiled by tipcamera.com