
Introduction
When it comes to macro photography, many photographers often find themselves stuck in a creative rut. We tend to photograph the same subjects repeatedly, searching for new compositions that seem unattainable. However, there is a technique that can help break this monotony and breathe new life into your macro photography: using fairy lights. In this article, we will explore the world of fairy lights and how to effectively incorporate them into your macro photographs. By the end, you’ll not only learn how to enhance your images with a cheap accessory but also have lots of fun in the process!
What are fairy lights?
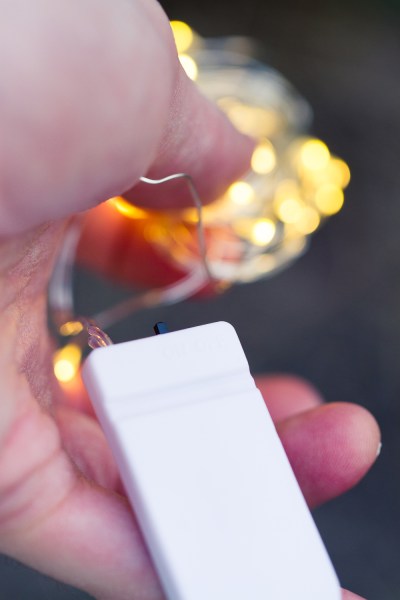
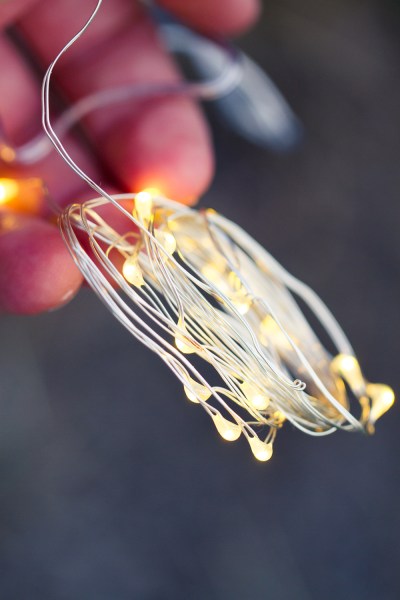
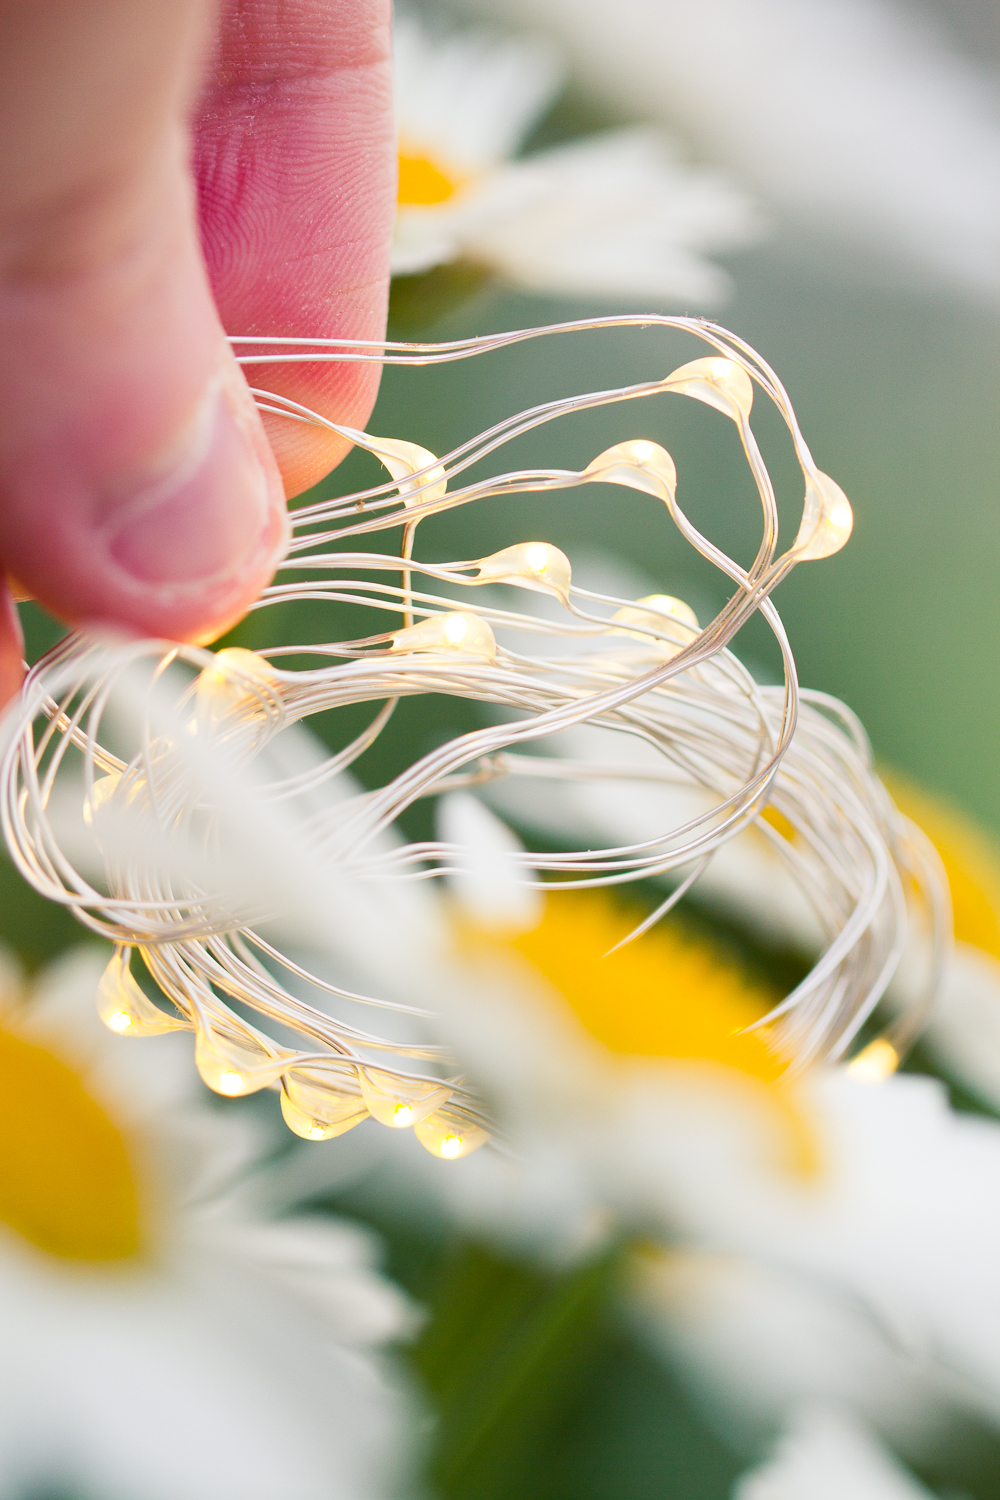
Fairy lights, also known as micro LED lights, are tiny LED bulbs that create a beautiful soft glow. They come in a variety of colors and can be easily purchased online, such as on Amazon, for a reasonable price. While warm white fairy lights are preferred by many, feel free to experiment with different colors as they can give your photographs unique tones and moods.
What makes fairy lights interesting?
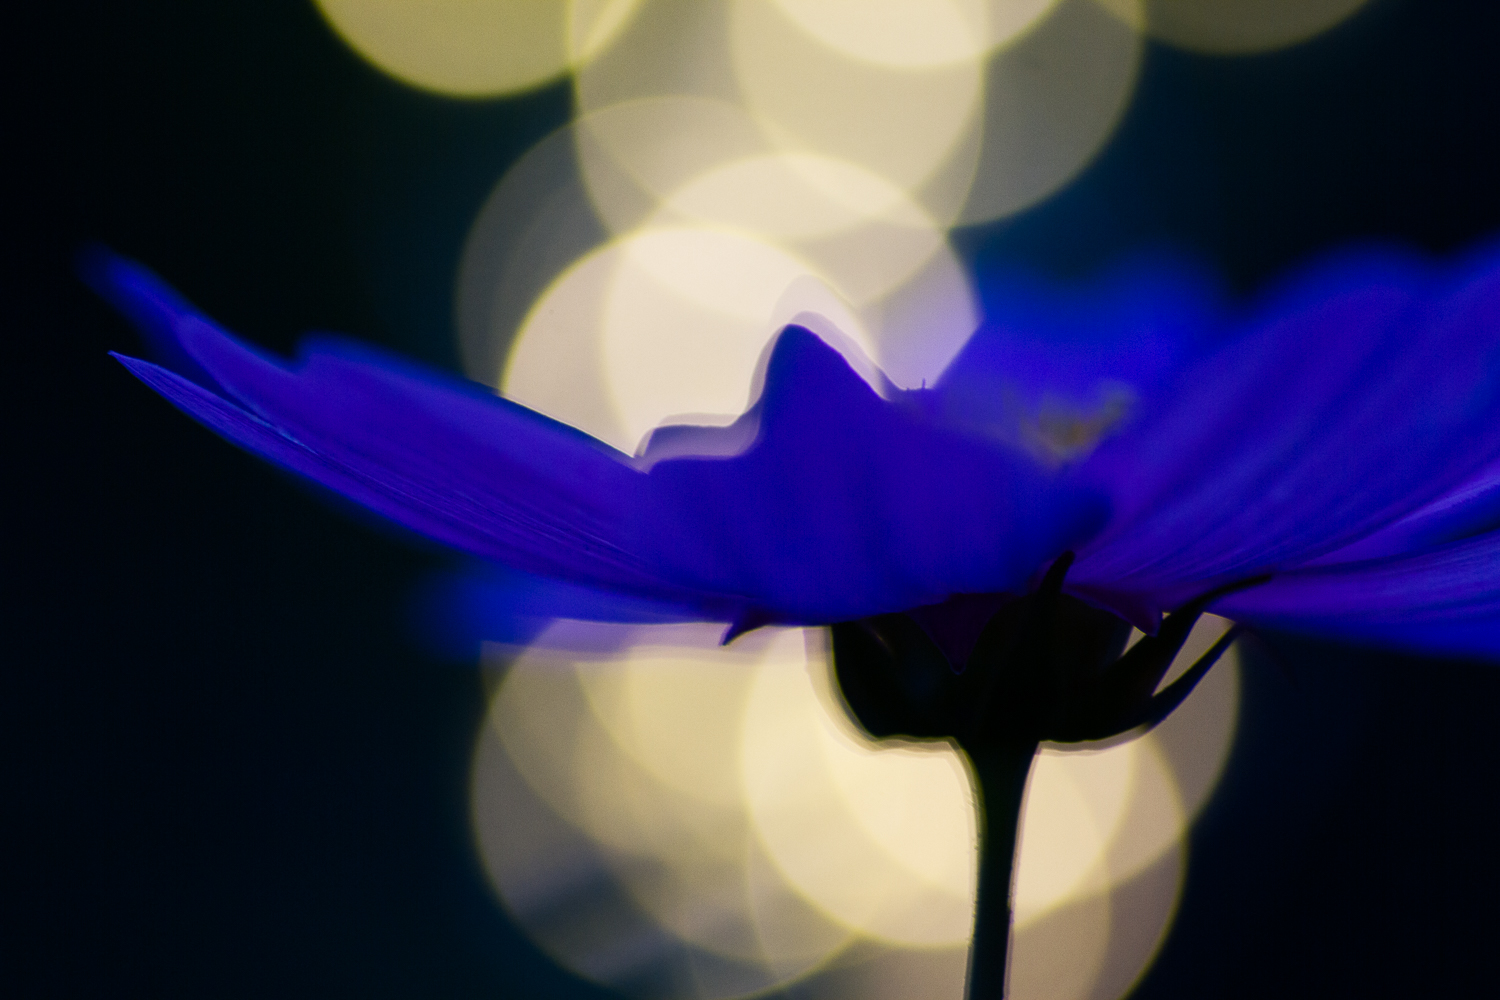
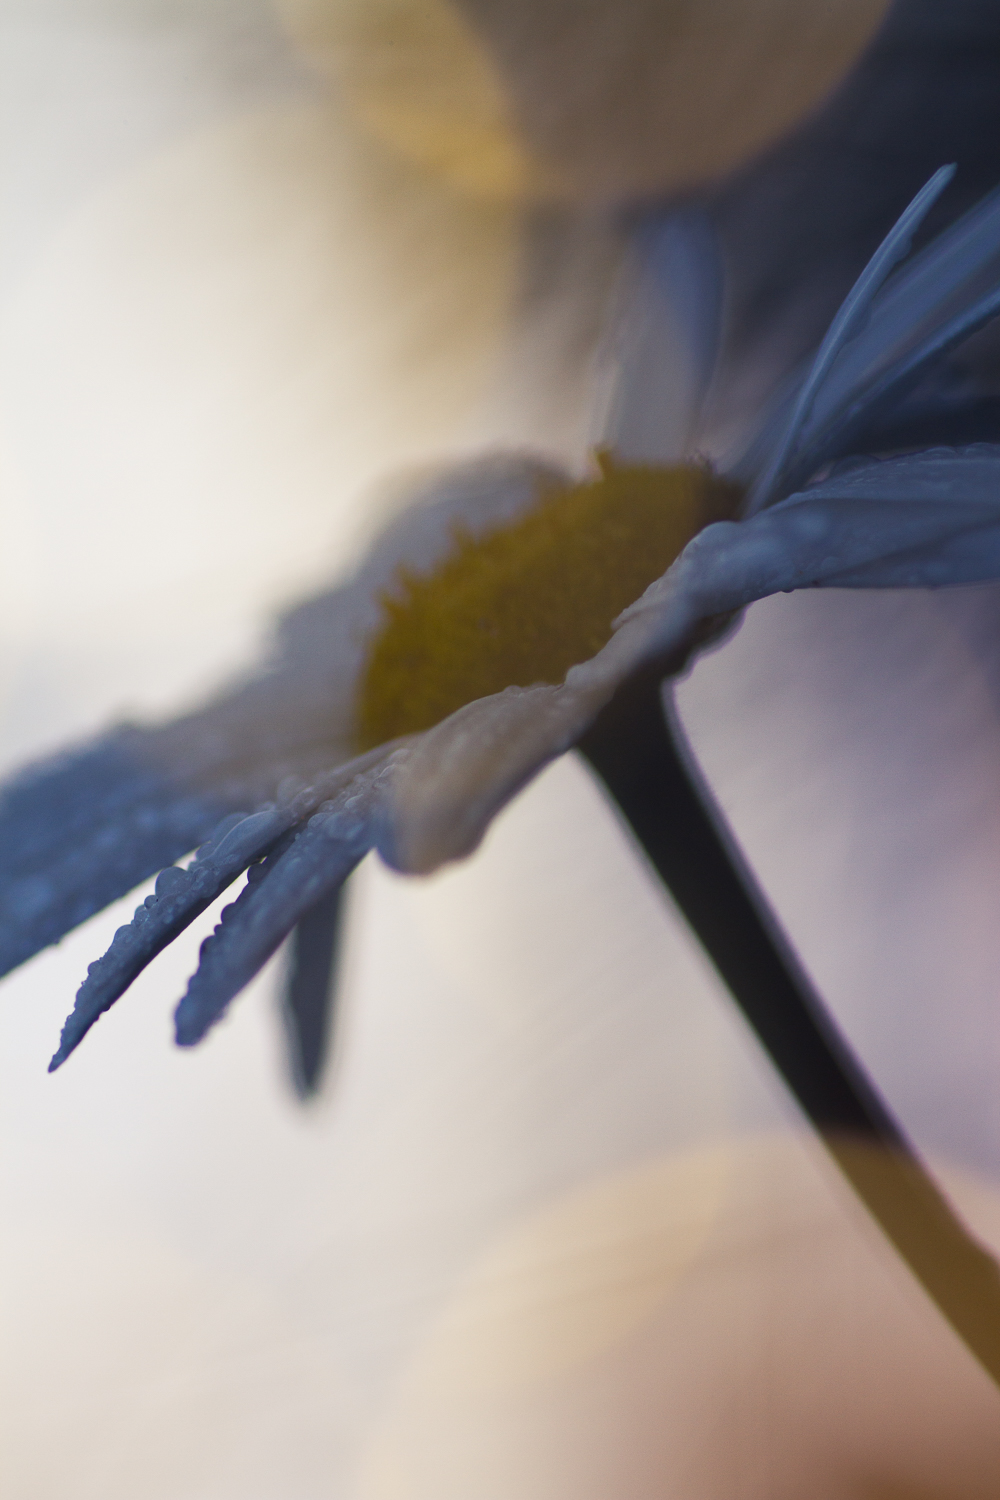
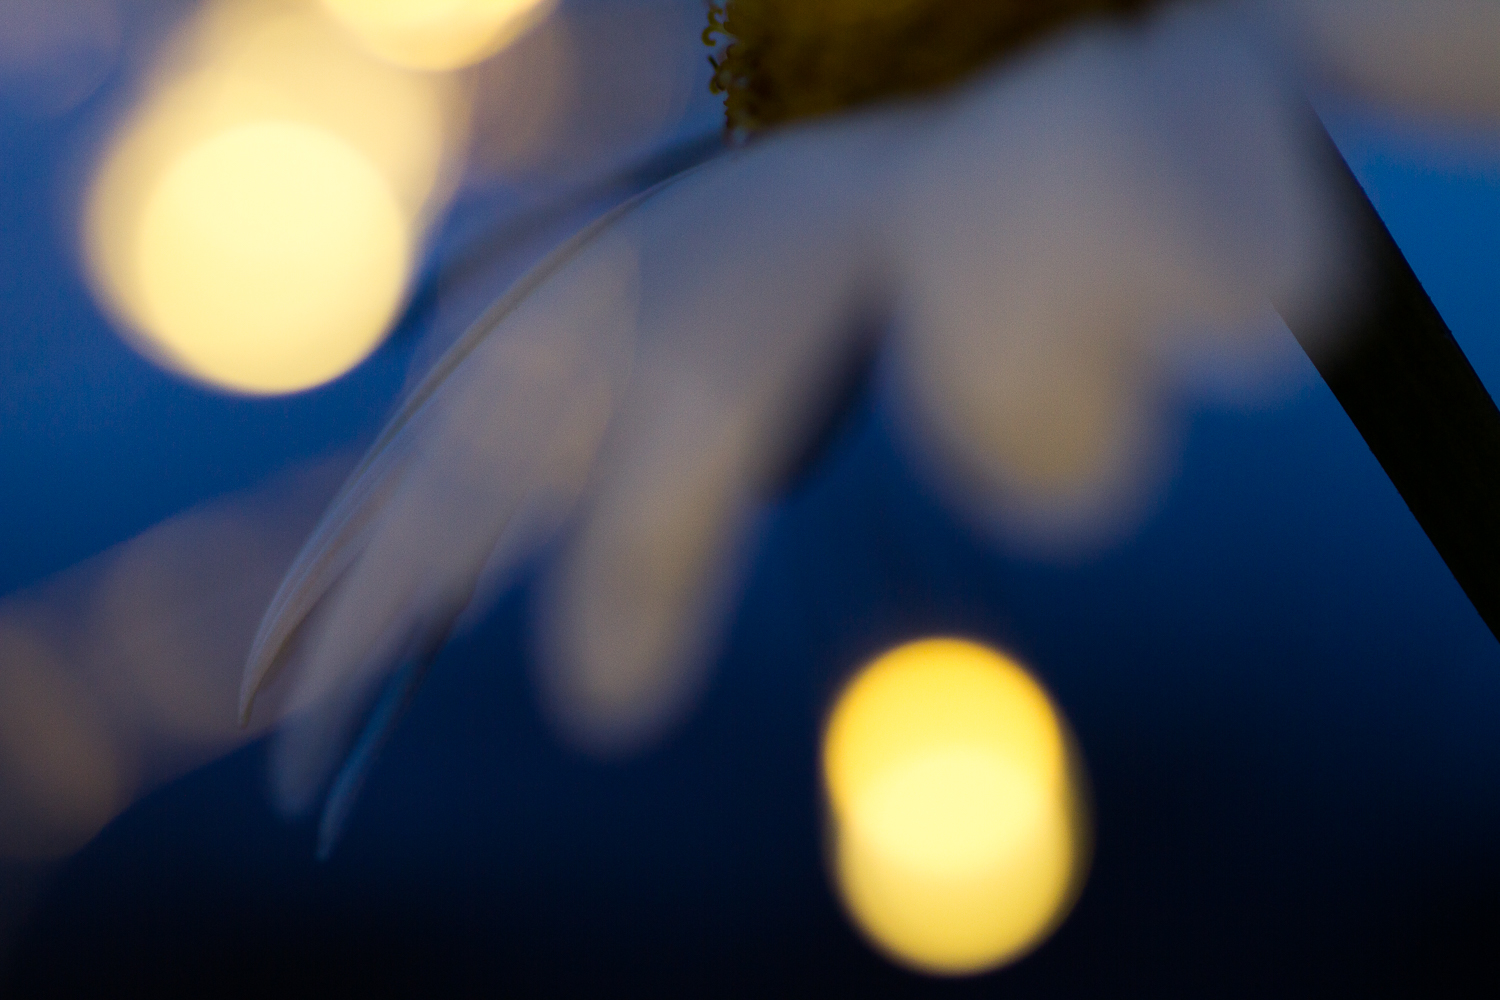
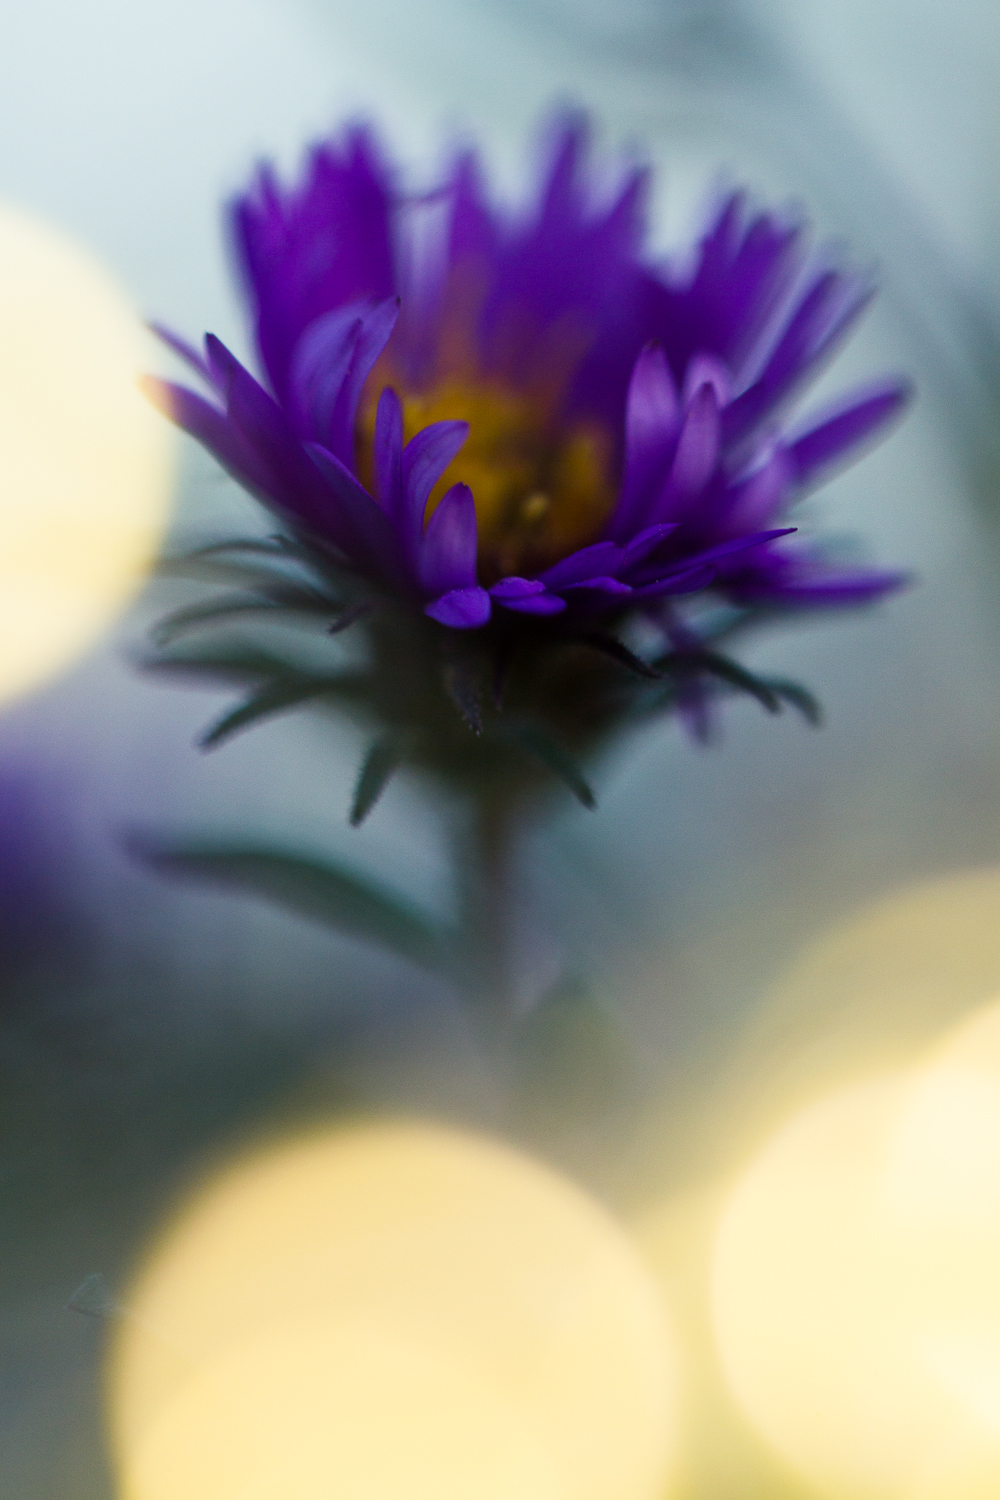
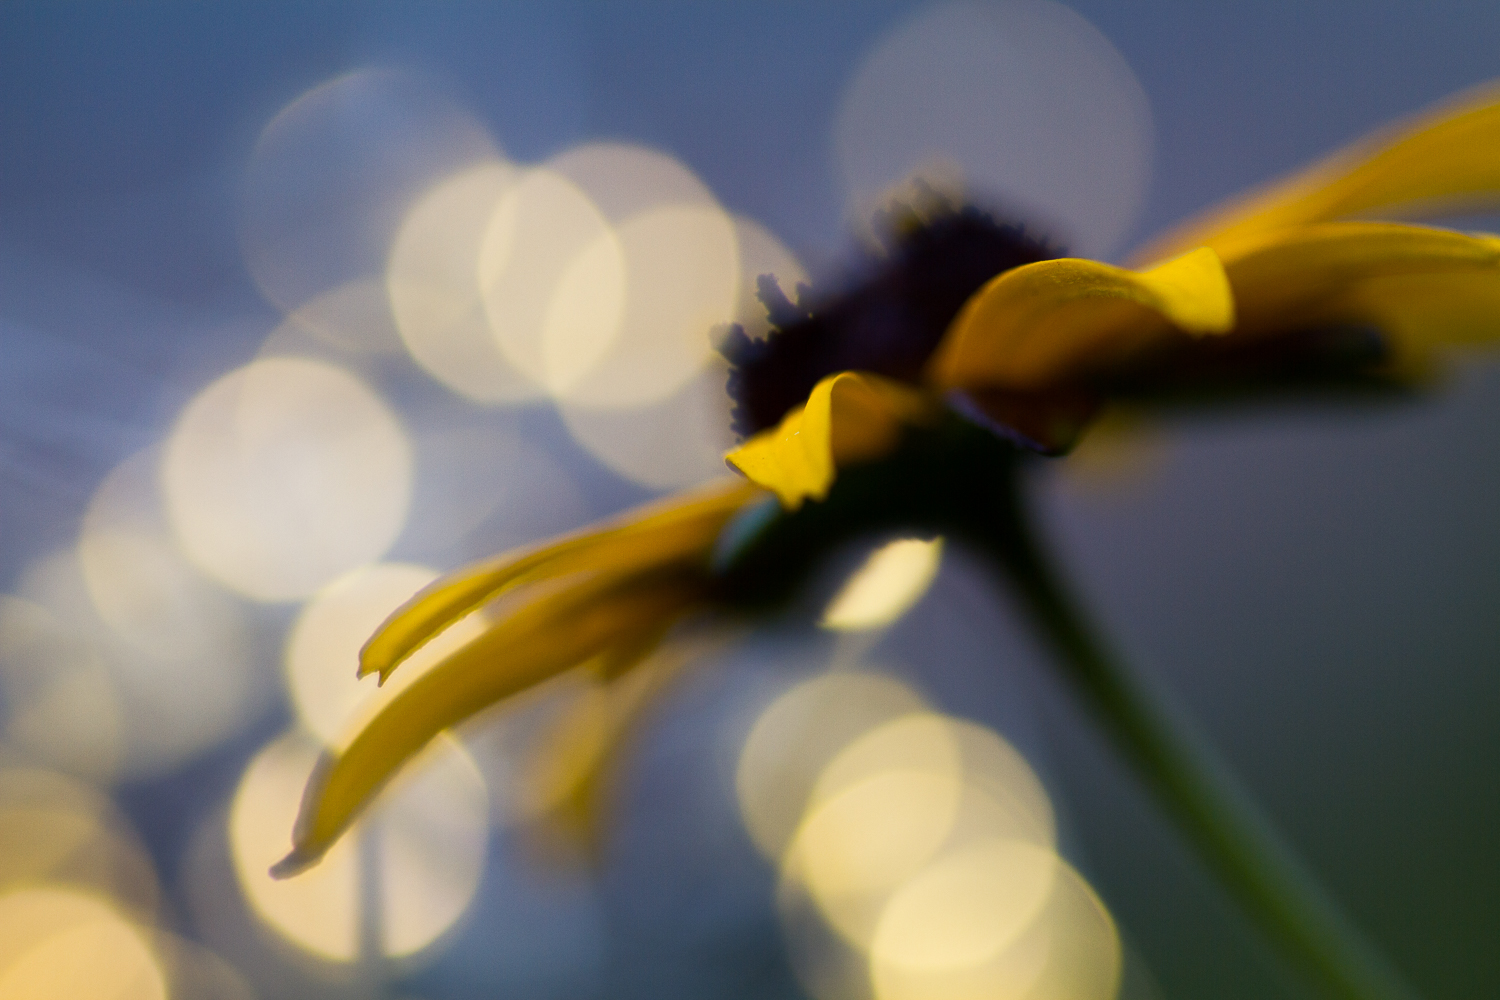
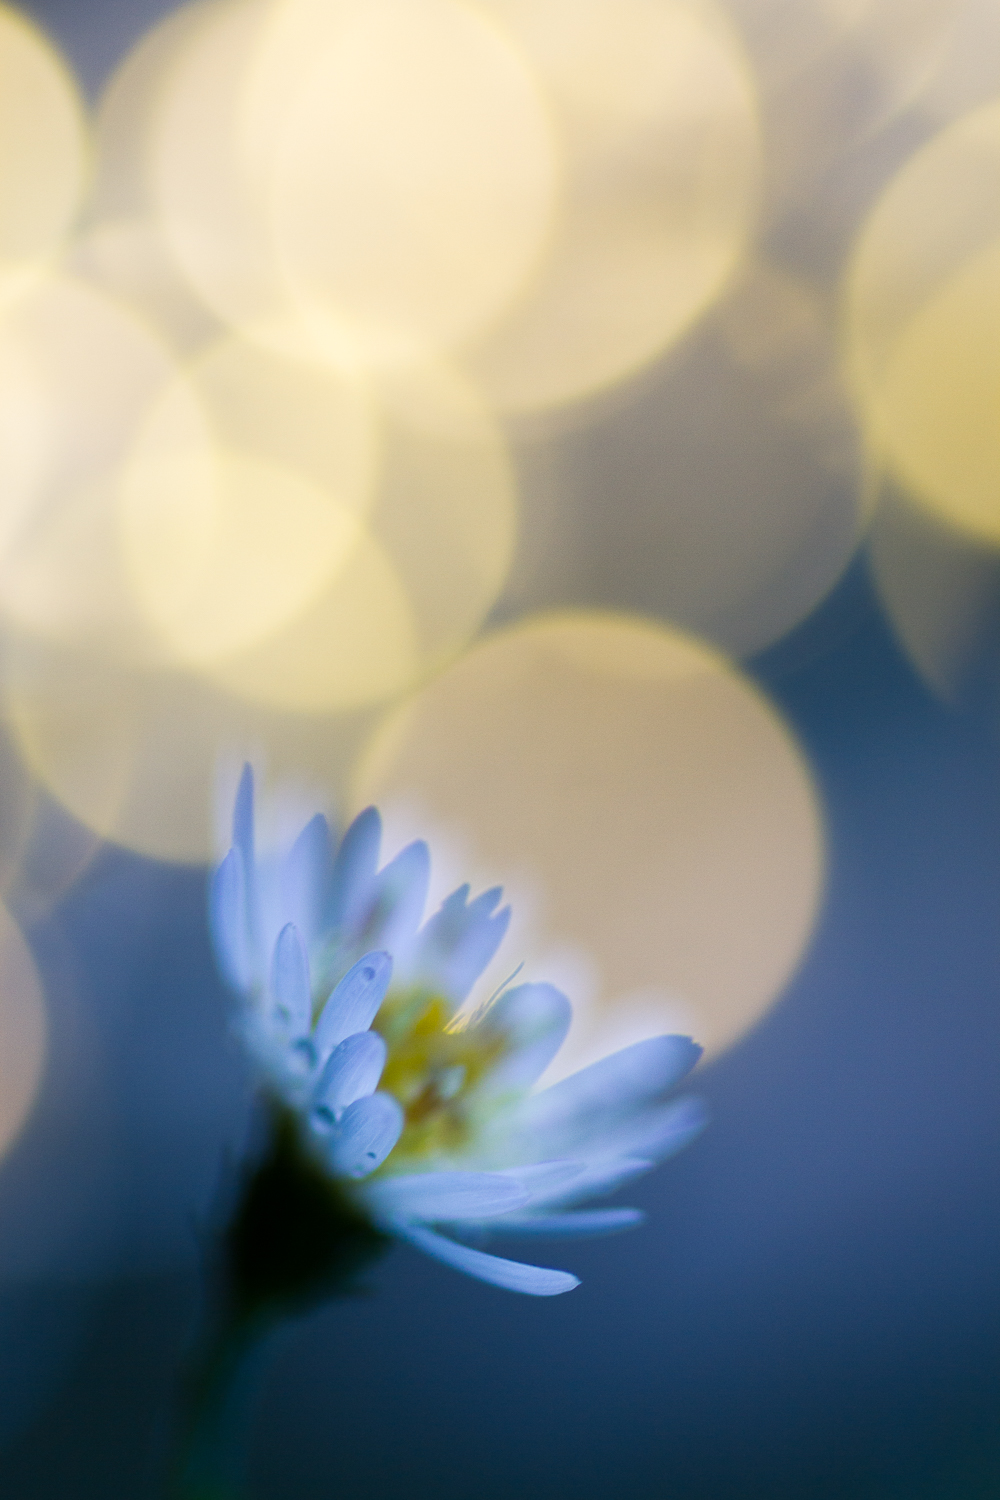
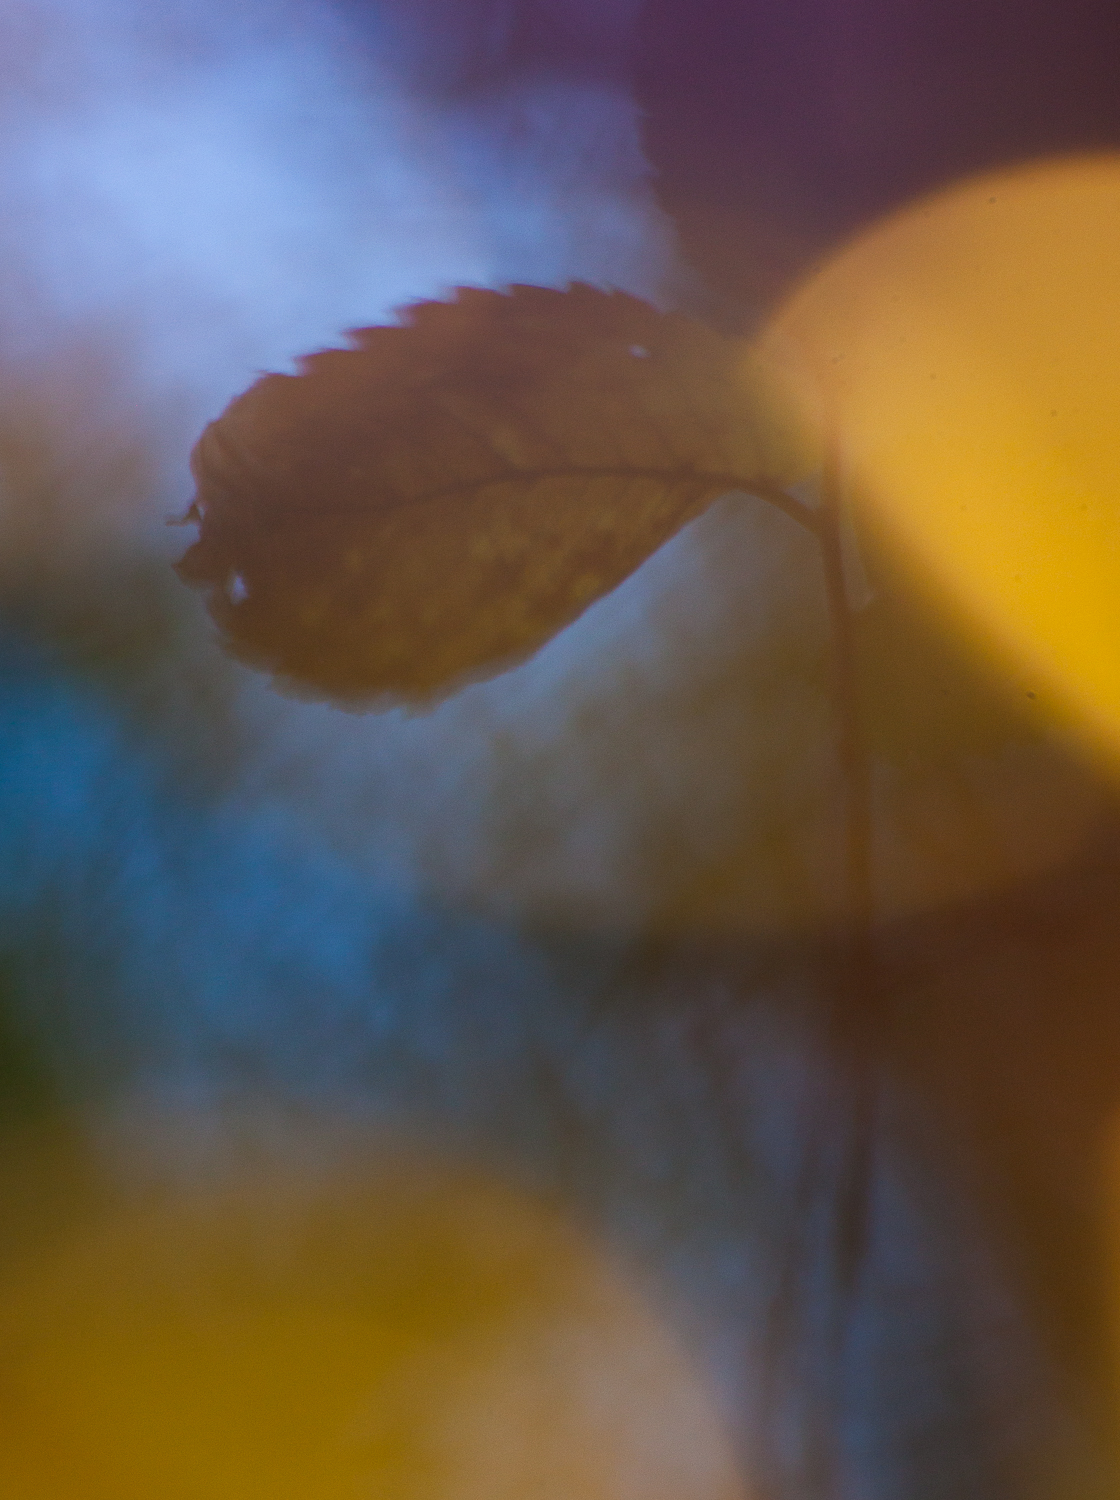
The main reason why fairy lights are so beloved by photographers is their ability to create beautiful bokeh. Bokeh refers to the out-of-focus areas in an image, characterized by soft, blurred highlights. When placed properly in a photograph, fairy lights can produce stunning out-of-focus highlights that add a magical feel to your images. This effect can be utilized in various genres of photography, but it truly shines in creative macro photography.
How to use fairy lights?
Work in the twilight hour
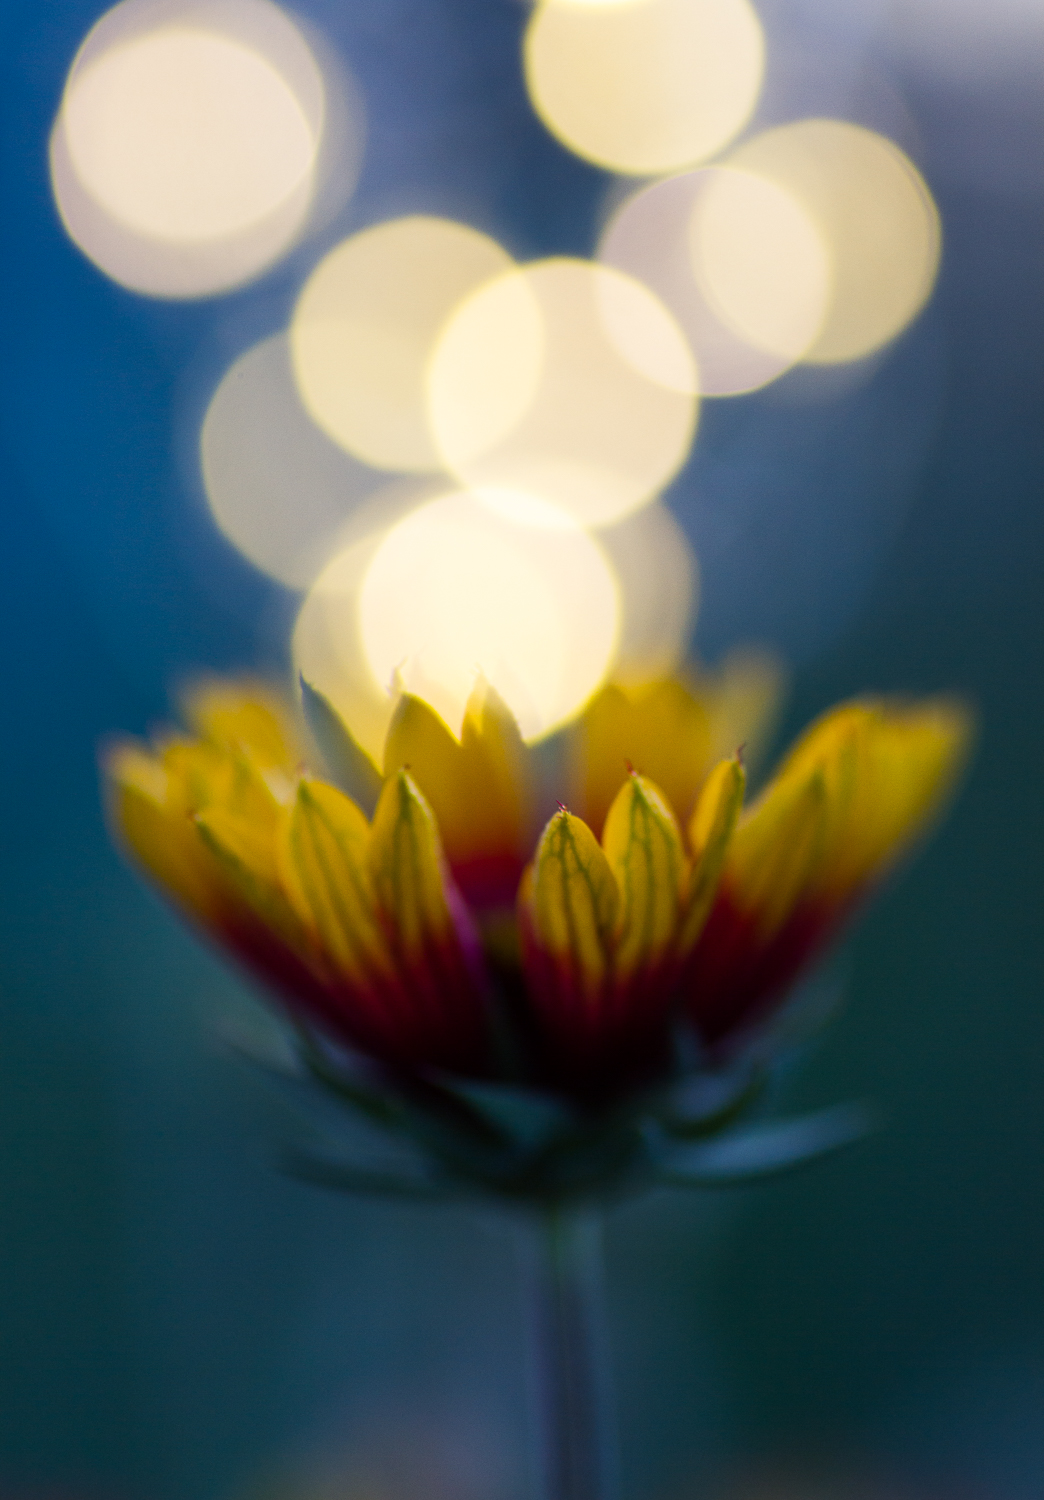
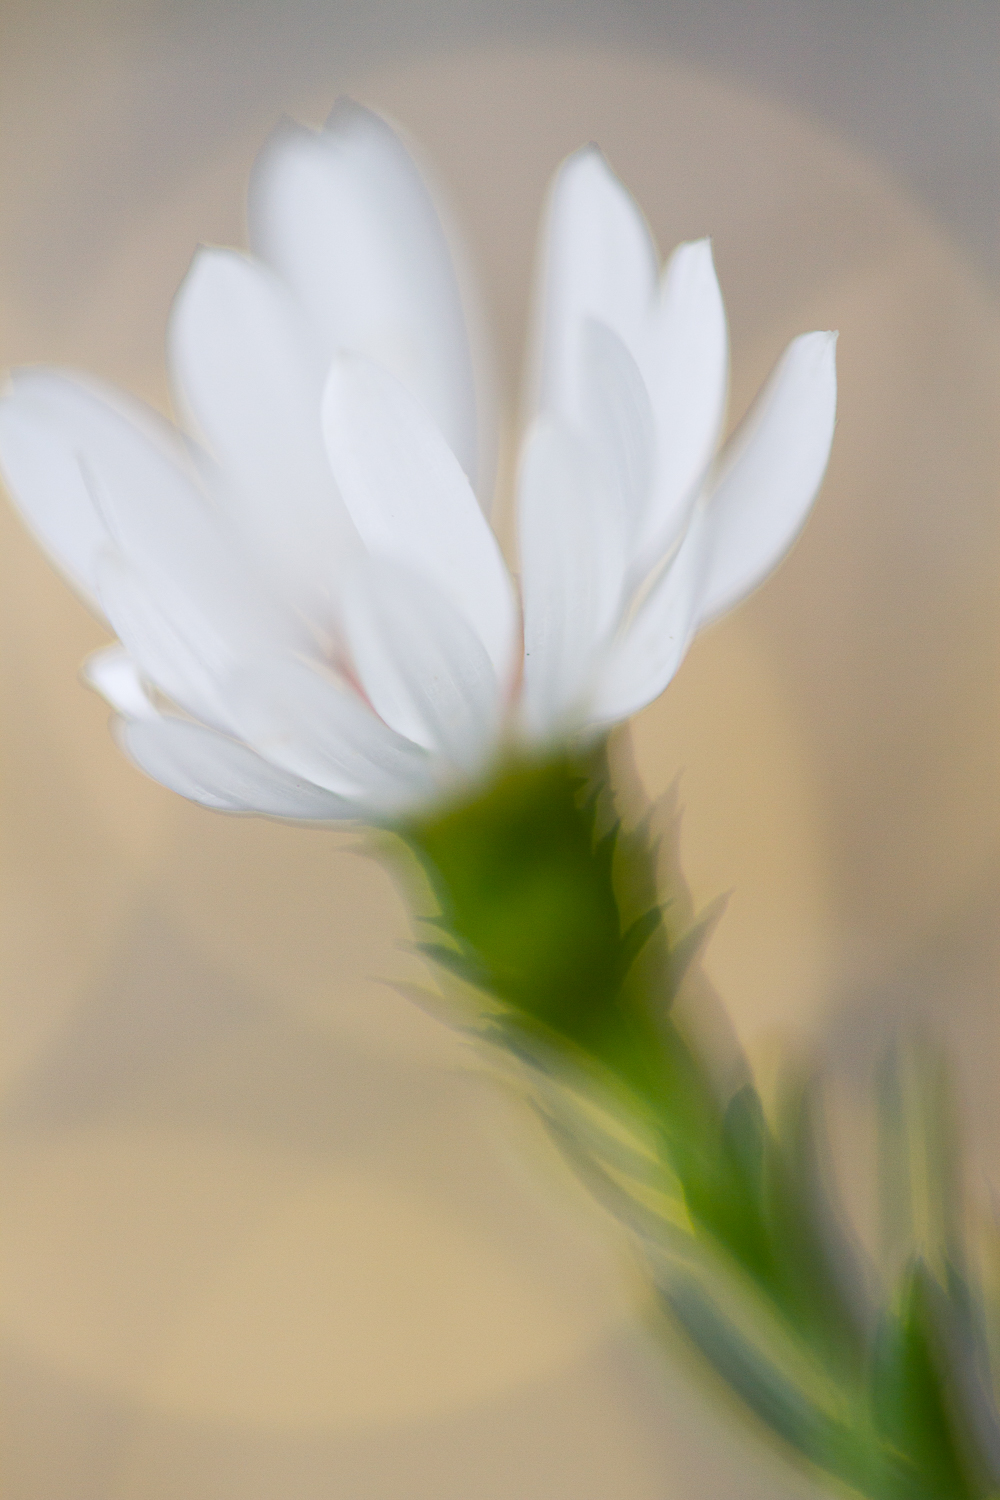
Fairy lights are not extremely bright compared to ambient light, so it is necessary to shoot during the twilight hour for optimal results. This is the time just after sunset when the light is soft and gives a lovely atmosphere to your images. If your subject is shaded or the day is cloudy, you can start shooting a few minutes before the sun has completely set. As the level of ambient light decreases, the fairy lights become more noticeable and create a stunning contrast against the darkening background.
It is advisable to shoot handheld until it becomes too dark to maintain sharp focus. This is usually around 30 minutes after sunset. However, if you prefer to use a tripod, you can choose to stay out later and continue capturing the magical ambiance that fairy lights offer.
Shoot wide open and feel free to underexpose
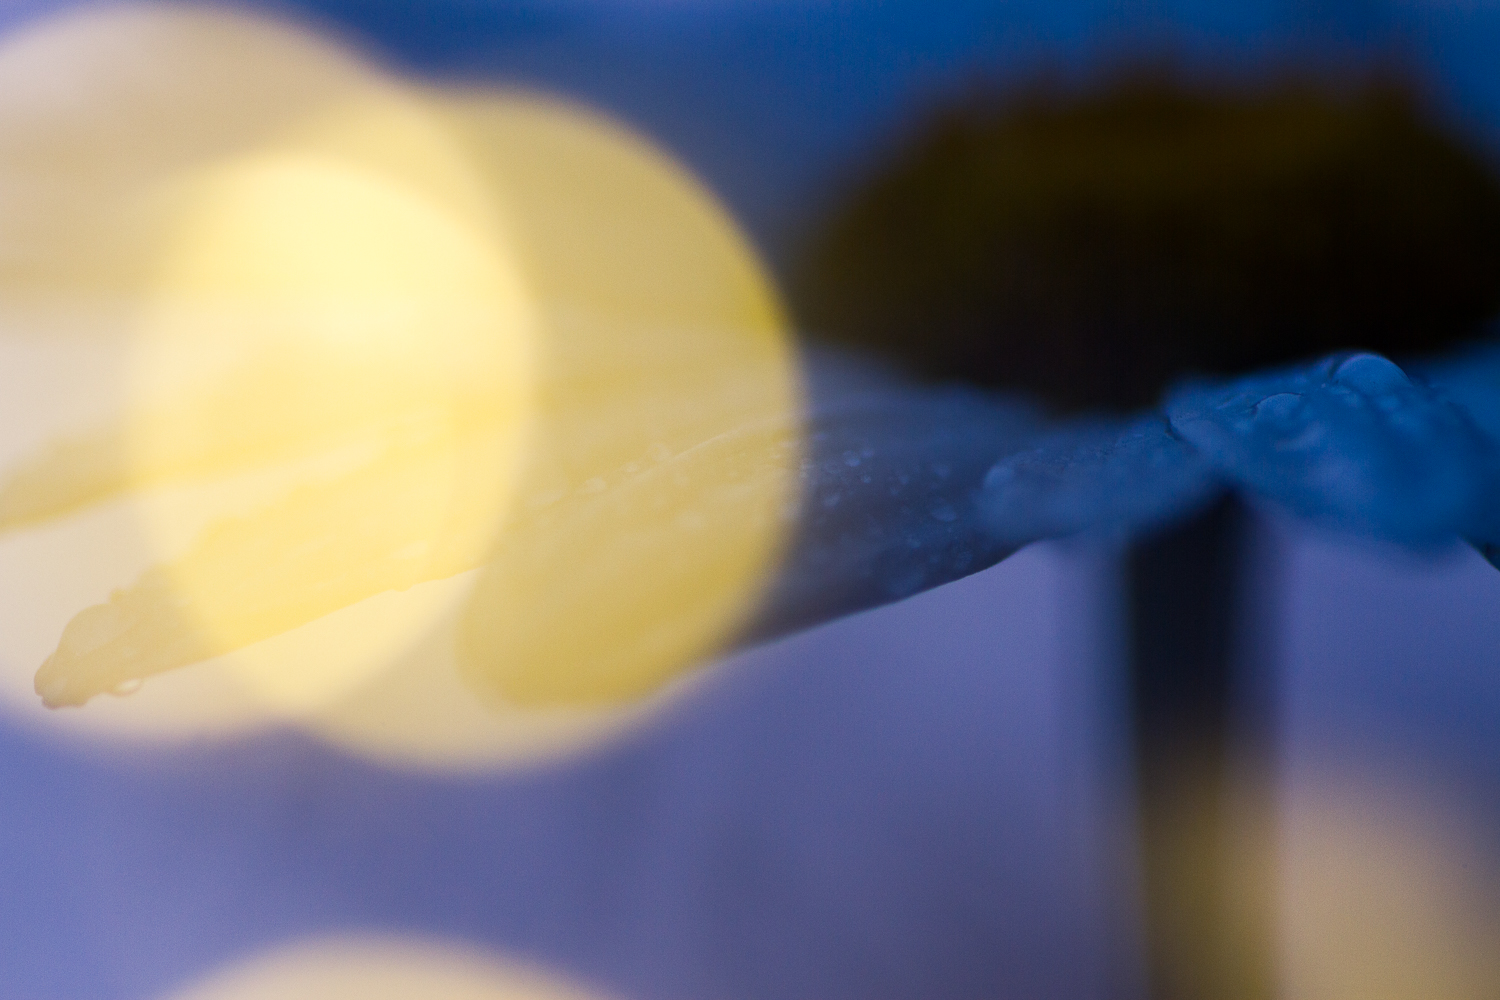
When it comes to camera and lens settings, the lens aperture plays a crucial role in creating the desired effect. To maximize the amount of light entering the camera and achieve a pleasing bokeh, it is recommended to set your lens aperture to its widest setting. For most lenses, this is around f/2.8. Shooting at a wide aperture not only helps compensate for the lack of ambient lighting but also beautifully blurs the fairy lights in the background.
Regarding the shutter speed, it is recommended to meter off the main subject, often a flower in macro photography, and deliberately underexpose the image. By doing so, you will achieve a blue twilight aesthetic, emphasizing that the image was taken after sundown. Additionally, underexposing the image also makes the fairy lights stand out more prominently.
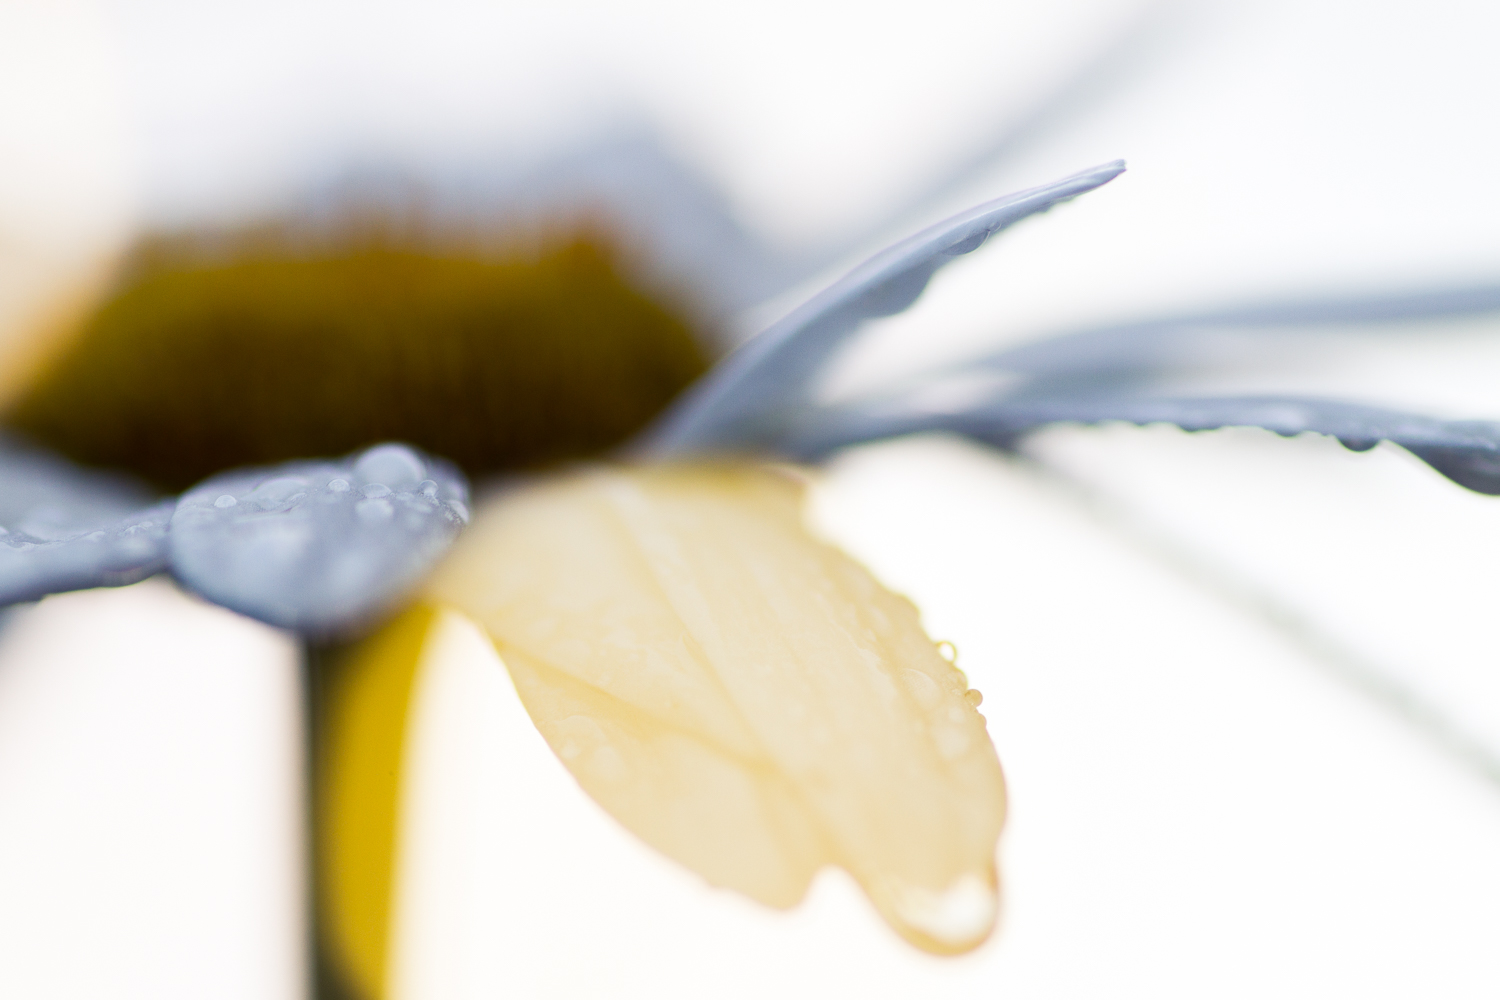
As for the choice of lens, macro lenses are excellent for capturing the intricate details of small subjects. However, you can also experiment with other fast lenses such as a 50mm f/1.8. These lenses are smaller and easier to handhold, offering versatility in your macro photography.

In macro photography, focusing manually is often essential, and this holds particularly true for fairy light photography. As the light conditions become darker, autofocus may struggle. Therefore, it is recommended to switch your lens to manual focus to maintain control over the focus point. Utilizing Live View can also be helpful in such challenging conditions. It allows you to see the image on the camera’s LCD screen and adjust focus accurately.
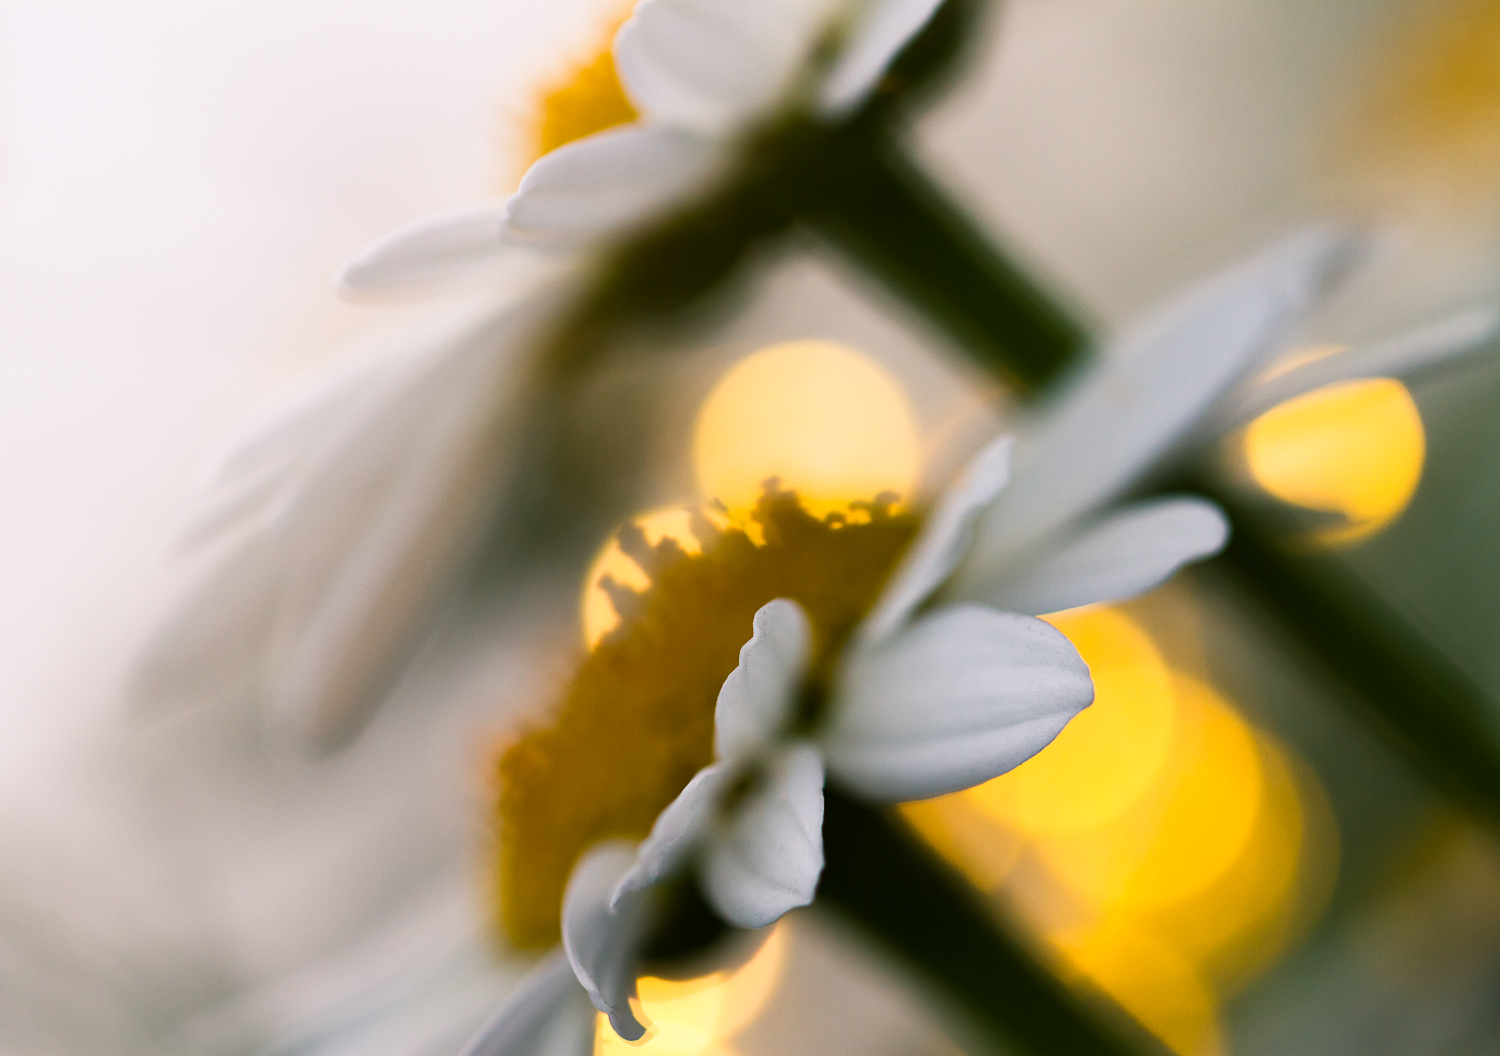
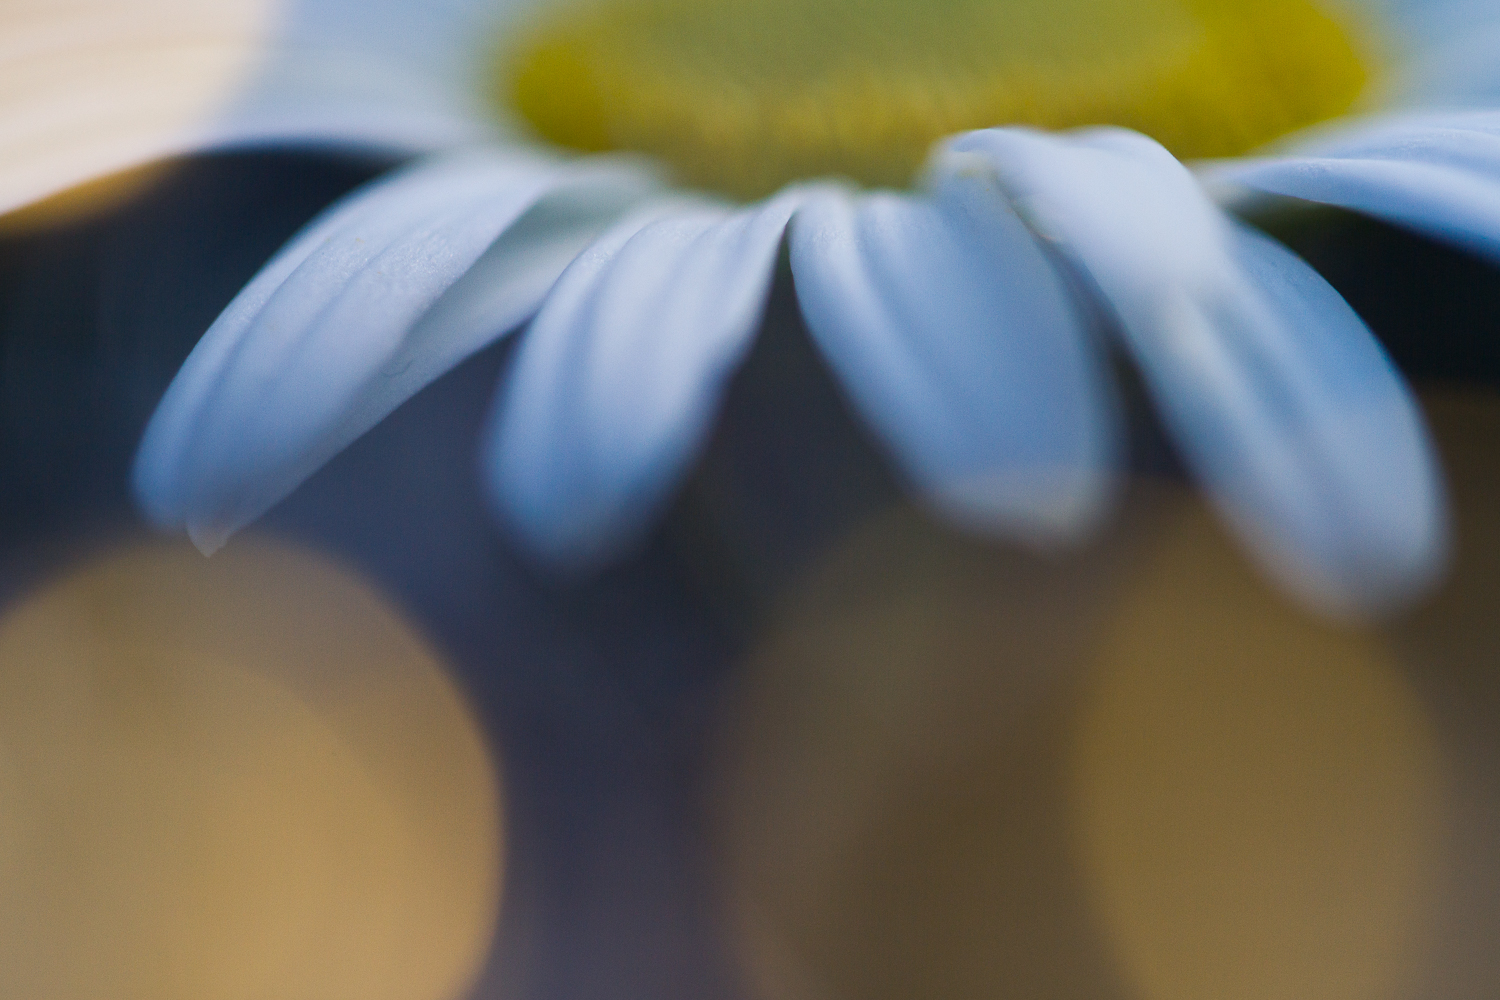
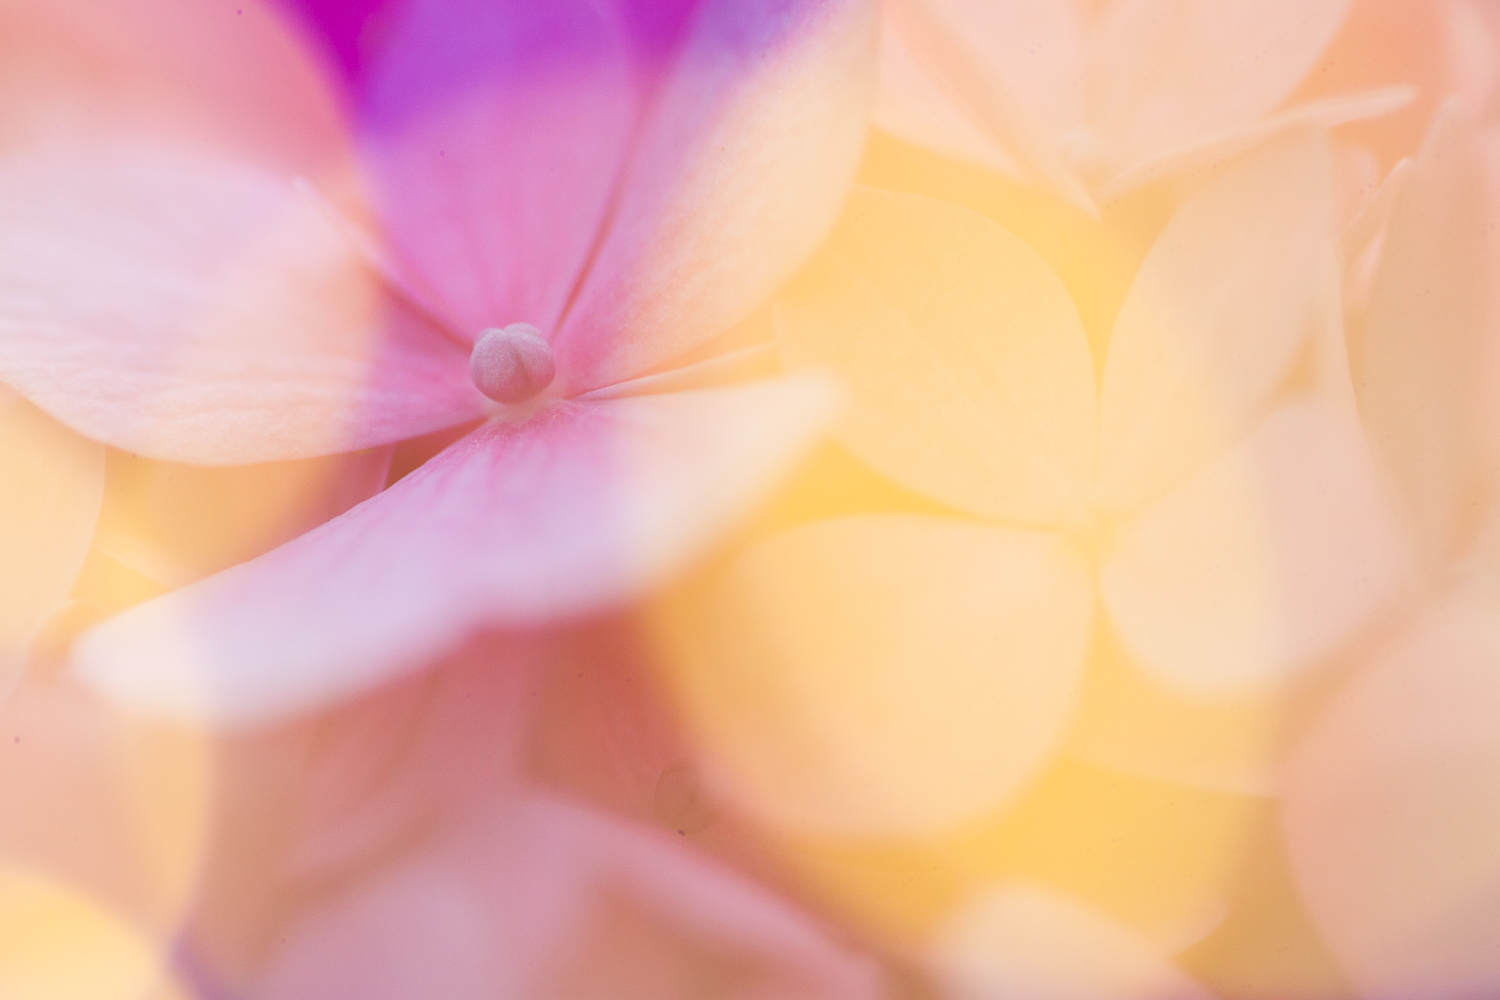
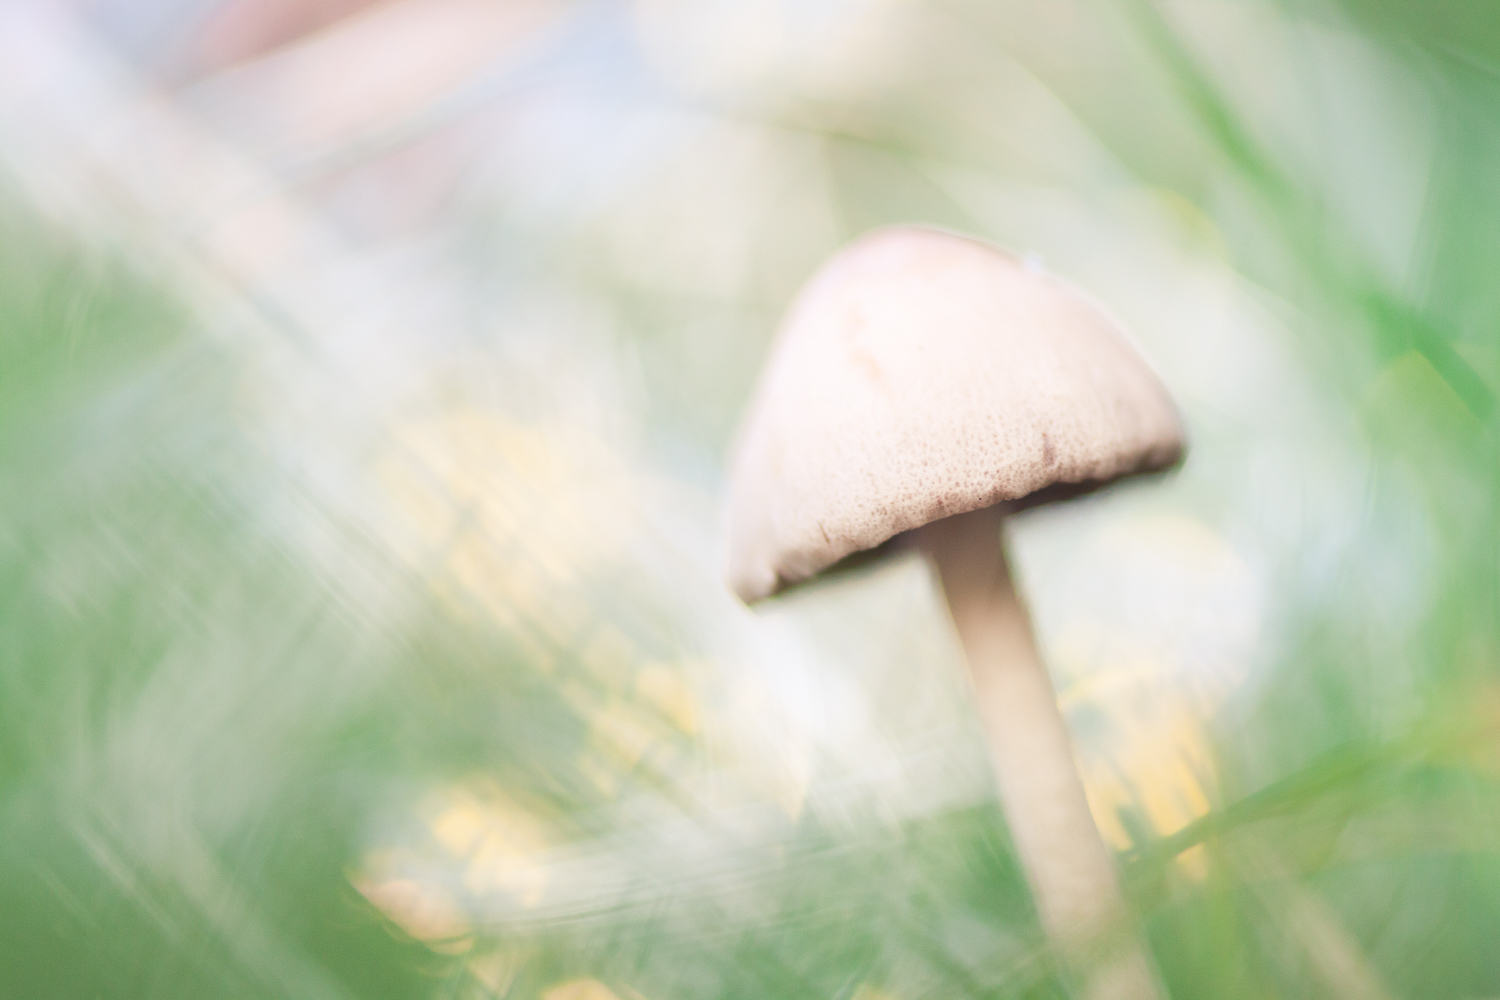
There are two general approaches for incorporating fairy lights into your compositions. The first approach involves placing the fairy lights behind the main subject, creating out-of-focus highlights in the background. This technique works best when there is some distance between the subject and the fairy lights. The lights should be positioned in a way that they appear as beautiful background highlights and not as recognizable fairy lights. This can be achieved by draping the lights over other flowers or branches behind the subject.
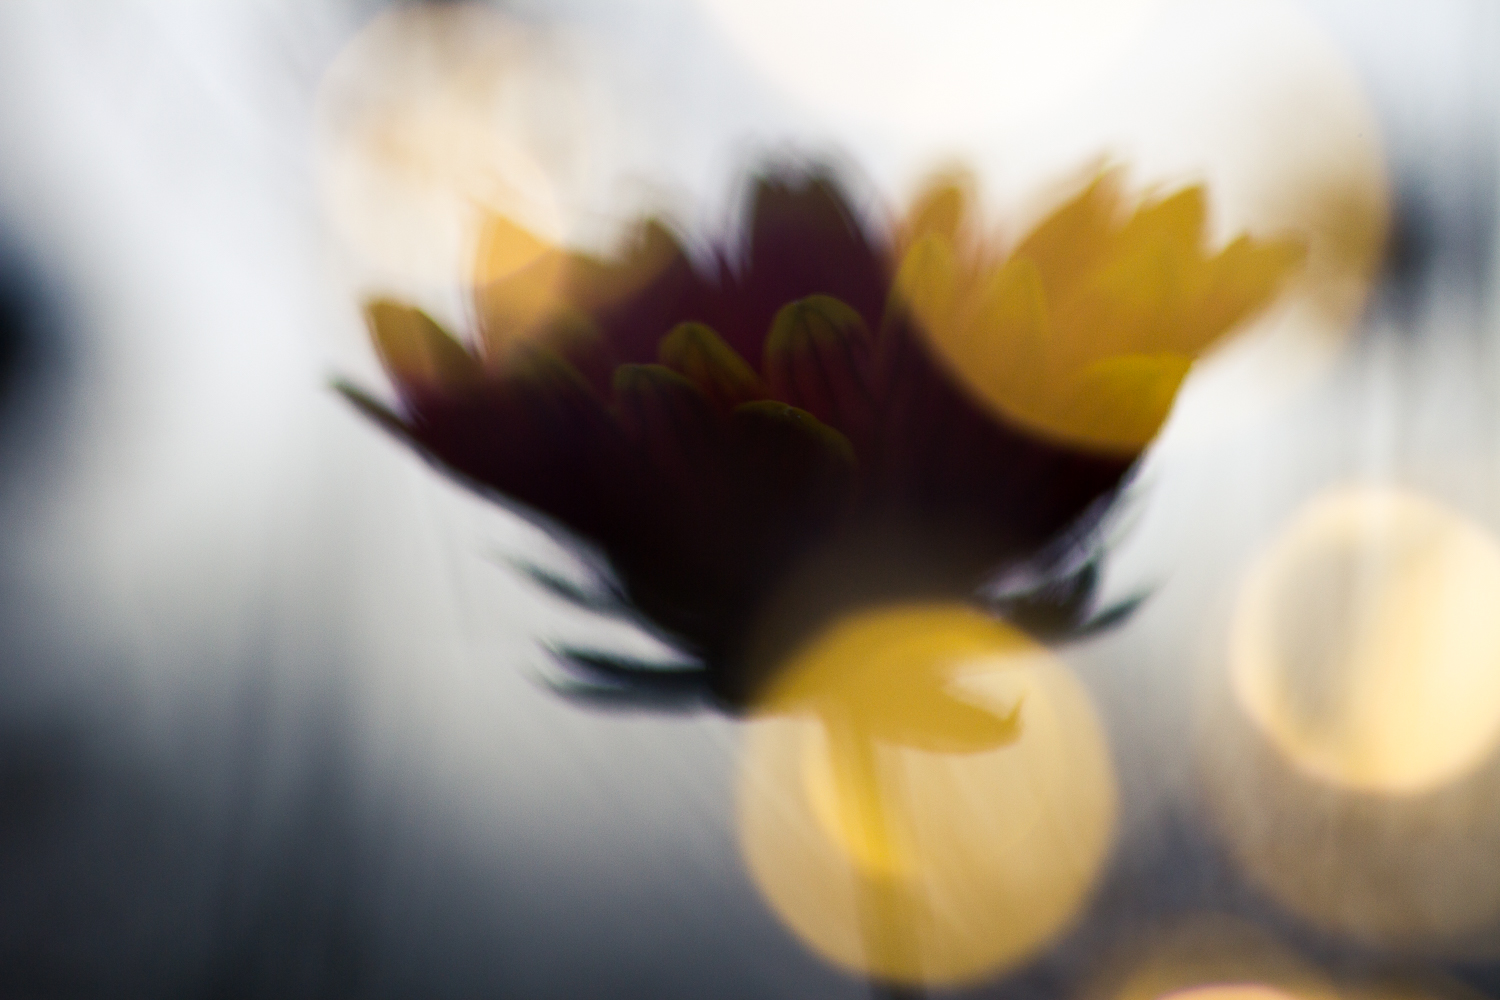
The second approach is more challenging but yields incredible results. It involves placing the fairy lights in front of the subject, very close to the lens, ensuring that they remain out of focus. This technique creates strong bokeh and adds a dream-like quality to your images. To achieve this, you can hold the lights in front of the lens with one hand while manually focusing with the other. This way, the lights will appear as out-of-focus highlights, enhancing the overall composition.
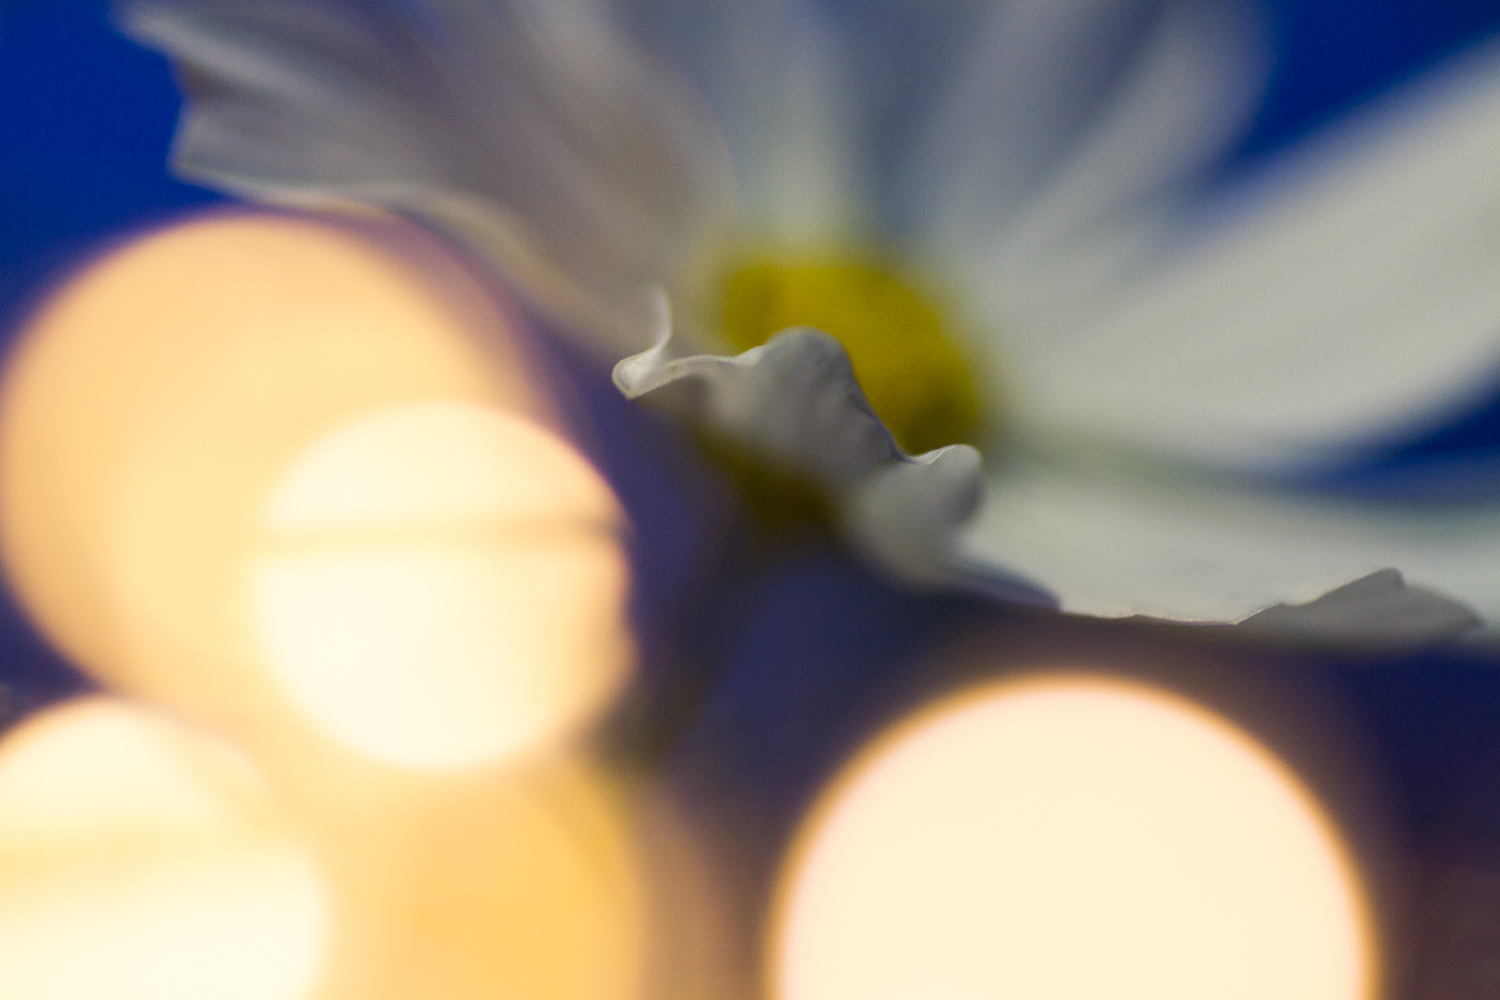
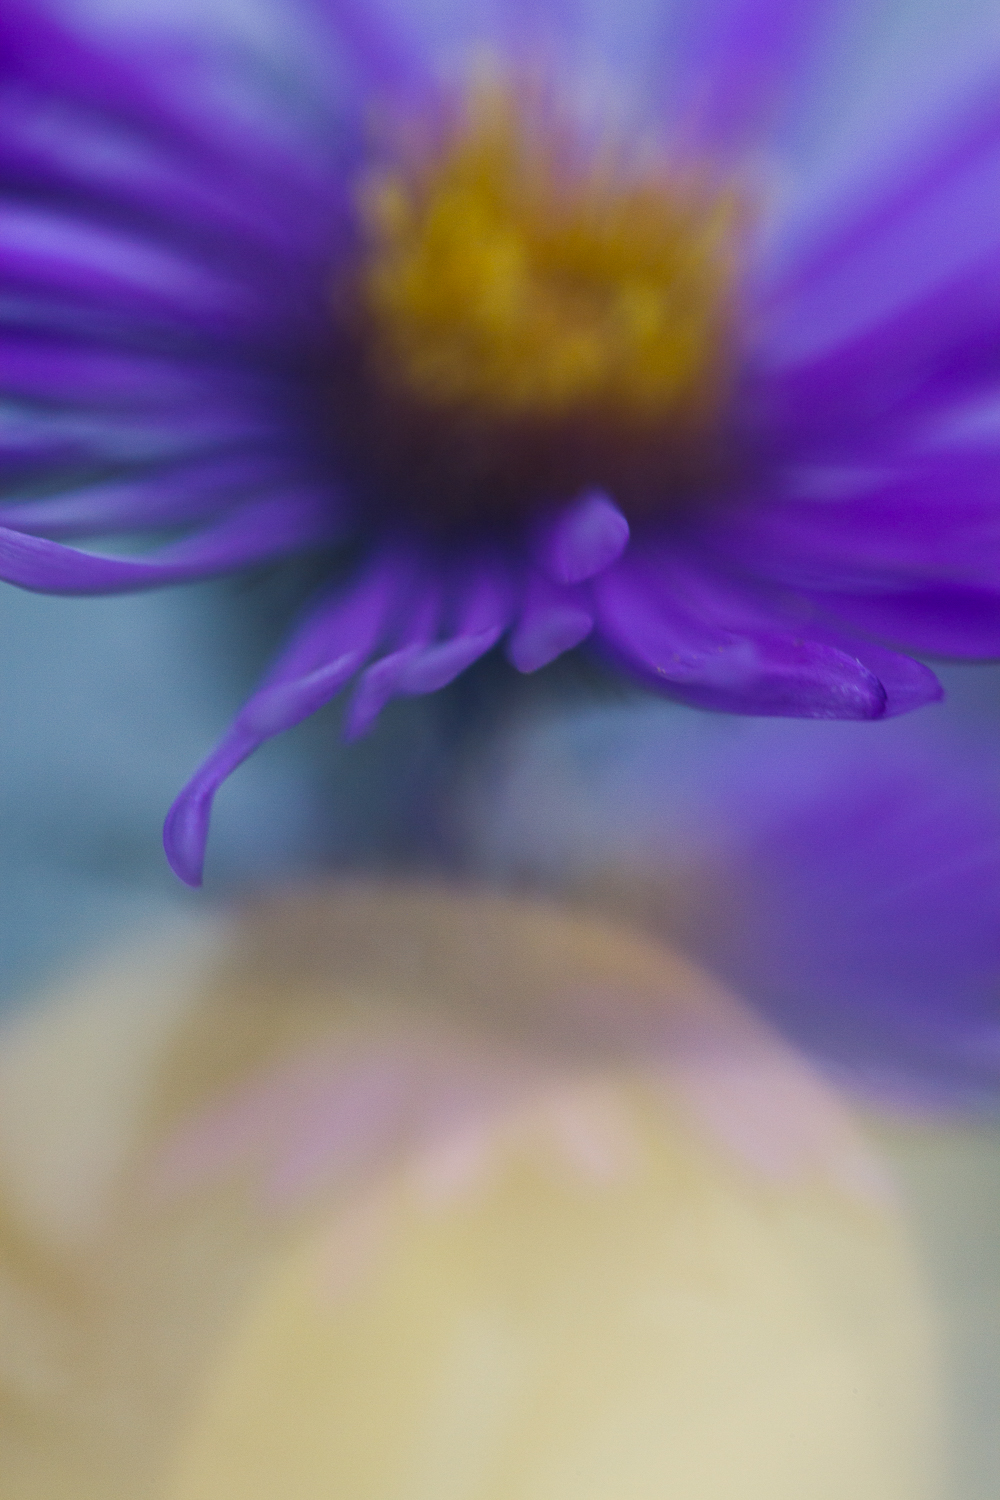
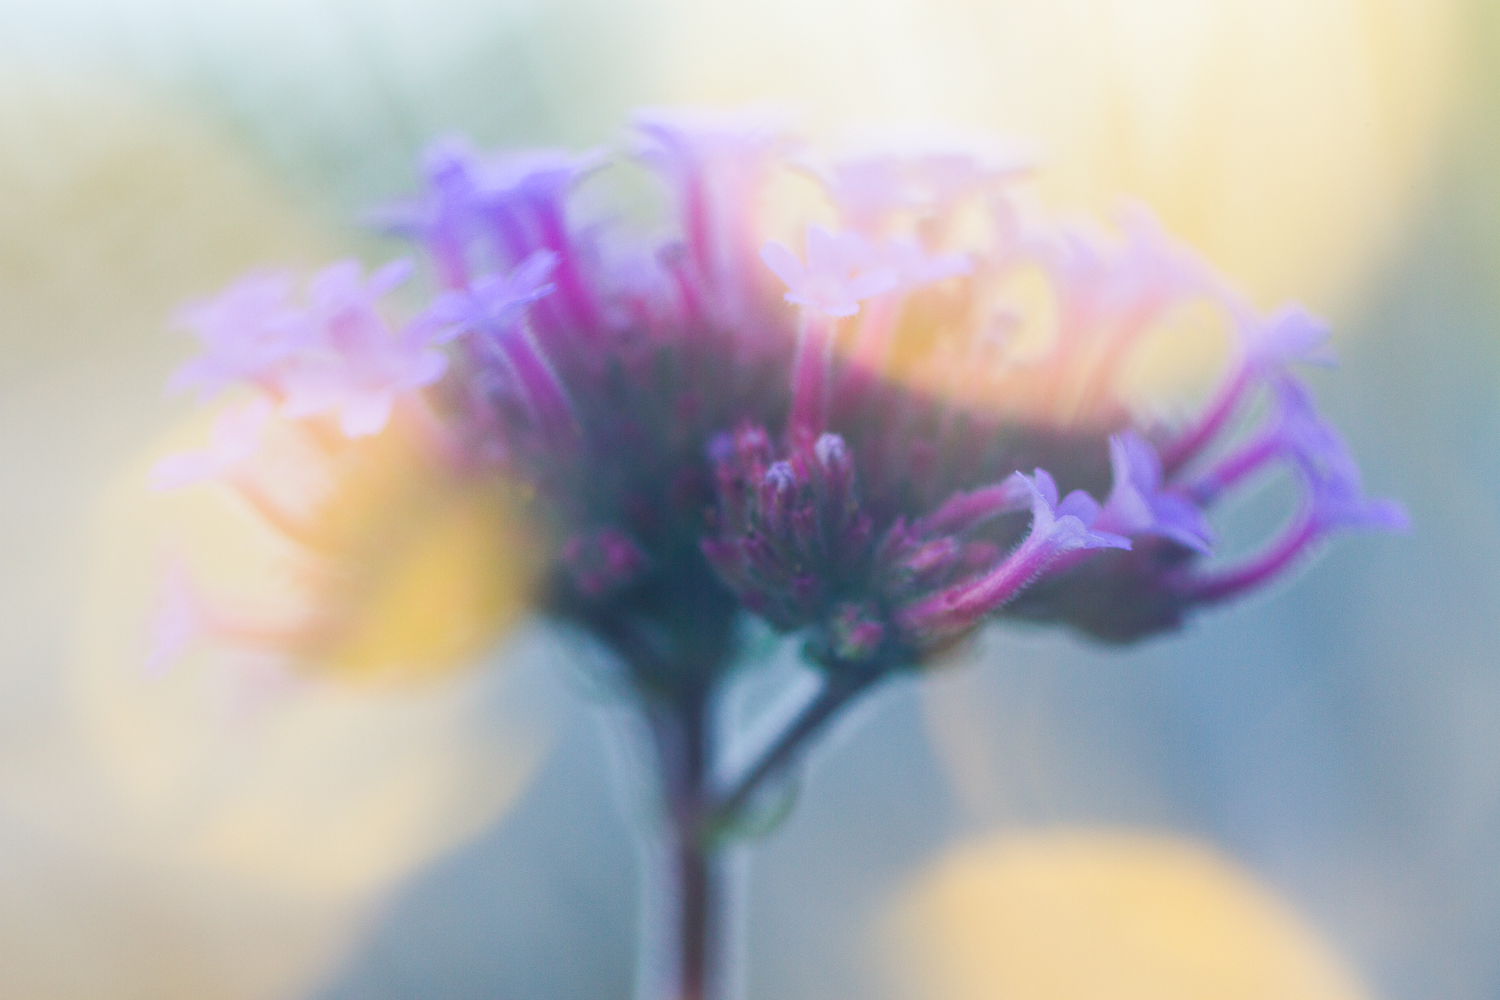
When composing your shots, it is essential to ensure that the fairy lights complement the main subject. Avoid letting the lights spray randomly throughout the background, as this can create a chaotic appearance. Instead, place the lights strategically above, beside, or even to ring the subject. If you are using the technique where the lights are in front of the lens, make sure they do not block important parts of the subject, allowing viewers to focus on the main subject effortlessly.
Conclusion
Fairy lights offer a unique and creative way to enhance your macro photography. By using these tiny LED lights, you can add a magical touch to your images, breaking free from creative ruts and exploring new possibilities. Remember to experiment with different colored fairy lights and don’t hesitate to try this technique in other genres of photography, such as portrait or pet photography. With the guidelines and tips provided in this article, you will be well-equipped to capture stunning and eye-catching images that will leave a lasting impression on viewers. So go ahead, grab your camera, and venture into the whimsical world of fairy light macro photography!

Do you have any creative macro photography techniques that you’d like to share? Feel free to leave them in the comments section below and inspire fellow photographers.
The article is compiled and compiled by tipcamera.com